More and more often we’re seeing sites using the sticky position property for elements on their pages. Just as the name suggests, the property allows the designated element to “stick” on the page even after you’ve navigated away from its original position. Position sticky is, in fact, just another CSS position property like the classics – static, relative, absolute, and fixed.
Any element you have on a page can be positioned in such a way through the use of CSS in your code. For those that know how CSS works within the HTML frame the process is rather straightforward – a couple of lines of code in the right place.
There are two important things worth mentioning at this point, however. Although mostly used for a top element (menu bar, search field, header, etc.) the sticky position property can be used on any part of the page, i.e. you can stick an element on the right, left, or bottom side of the page – something not often considered. The other point is the fact that nowadays everybody has a need for a website, be it business or private, but only a small percentage of people actually know how to use CSS.
After all, there’s always time to get deeper into coding down the line, but if you need the site to be up now, you’ll have to resort to a simplified solution. Since most people choose WordPress as their preferred platform to start these types of endeavors with, we’ve focused our search on viable plugins, and one popped out immediately – WP Sticky. If you need something to stick, WP Sticky will get it done.
No coding, no problem
Like we’ve mentioned earlier, one of the biggest issues in site management isn’t a lack of ideas, but instead the lack of knowledge to realize those ideas. With the likes of various page builders, all-in-one hosting services, background and theme packages, etc. we’ve come to a point where you really don’t need to know much about the underlying code to make something look and feel good.
Purists will still say that all of these can’t replace a good core script and they’re probably right, but there is a huge number of businesses/individuals out there that need a web presence, but don’t need the hassle of coding that comes with it.
WP sticky is one of those plugins that simplify functions dramatically compared to what you would have to take into account when using code. You’ll have a few fields to fill out, a few options to turn on or off, and a couple to click on, but after that, you’re off to the races.
The core functions you’ll be working with are divided into three groups – basic, visual, and advanced, with a separate button that adds a sticky element in the first place and a deleting option that’s pretty much self-explanatory.
 So, let’s start at the beginning…
Adding elements and the basic settings
To add an element you’re looking to stick to a page, you only need to click on the “Add New Sticky Element” button – it really doesn’t get any easier. Once that’s done, you need to name it and pick which element on the page it’ll be.
Because you can create multiple sticky elements, we suggest naming them with correlation to their type and/or function (for example – menu, header, search, etc.) enabling you to know what elements you have on disposal, by just glancing at the sidebar where they’re listed.

So, you’ve named the element, now it’s time to choose one from the page (these actions can be done in either order). To choose an element, you simply click on the “Pick Element” button that leads you to a preview of your site where you then choose the element you want to stick by clicking on it. After you’ve chosen and saved your progress that element will be sticky for anyone accessing the site from the frontend.

Visual settings
This is the section you’ll probably spend most of your time on since it’s the one that governs how your sticky element is displayed, and you’re doing all this because of visual functionality.
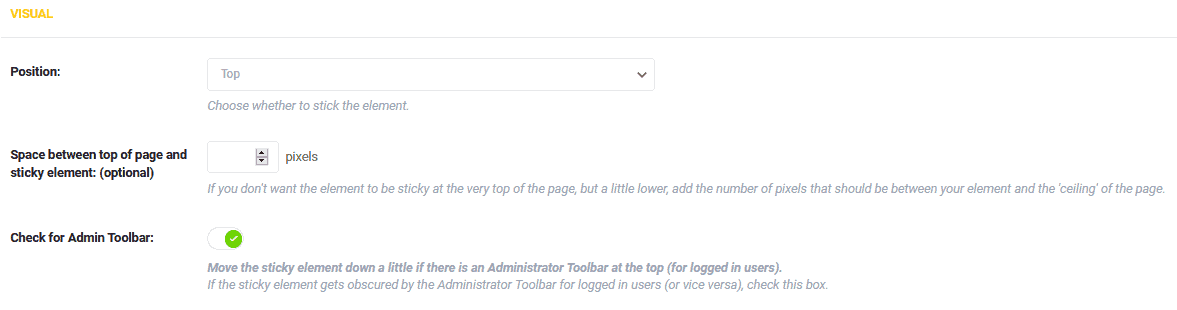
The very first thing you’ll pick out is the position where the element will stick. Like we’ve already mentioned, most of the time it’ll be on the top of a page, but it doesn’t necessarily have to be – you can stick an element virtually anywhere on the page.
While we’re talking about position, you’ll get to, optionally, separate the element (by pixels) from the top of the page, or keep it stuck to the upper boundary of the screen if you prefer. Additionally, since elements stick for backend users too, you can always set it up so they are below the admin toolbar when navigating down on a page to keep the toolbar visible.
This next part is interesting. Namely, you can set when the element will stick to the page depending on the size of the screen the said page is being viewed on. If a screen is larger than the set designation, the element will behave just like there is no sticky position at all.
There are four distinct default sizes (displayed in pixels) and you can even set up custom sizes in the advanced settings (which we’ll get into).
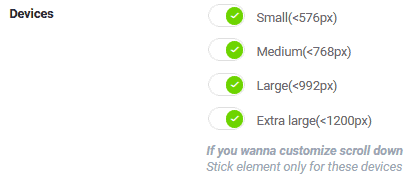
A feature like this goes a long way toward your site’s responsiveness, making it viable for phone, tablet, and desktop users alike. Take into account that web browsing is equally diversified between the devices (even hinging towards smaller screens lately) and you’ll probably end up being thankful for this feature more than any other on offer.
An interesting tidbit is the way in which the sizes are displayed (smaller than “number of pixels”) which indicates that sticky elements are preferred more on smaller screens, opposed to larger ones.
The Z-index is there if you have elements that could possibly obscure the designated sticky element. Think of the page as a collection of stacks, where certain elements are positioned on top of others. The higher the Z-index, the higher the element within these stacks.
So if you ever find yourself in a situation where the sticky element is obscured just manually enter a ridiculously high number to set everything right (99999 is even suggested right below the option).

Now comes the option to add an effect in which the element will be displayed, more specifically how it will come into view. The two options are fade-in and slide down. Since the sticky position is used on a top element that stays visible when scrolling down, the slide down effect presents itself as a natural choice, but there are instances where you could go with the fade-in. Either way, you’re covered.
If you want a sticky element to show, but still not occupy the page too much, you can customize its opacity. Set it to around 50% and both the element and content underneath should be visible. If you have something you really don’t want to get hidden, this is the feature to use.
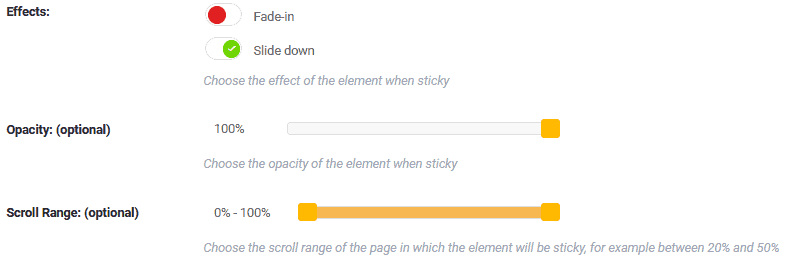
Finally, we get to adjust the scroll range i.e. the points in which the element starts and stops being sticky. Both of these points are represented as percentages of the whole page. For example, if your element is a header located on the top, you’d want it to become sticky at around 10-15% after the visitor has already scrolled down a little.
Then, at around the halfway point (45-55%), there really is no need for the header to still be visible, because at that point it’s redundant and only wastes space.
The starting and cutoff points are easily defined using an interactive bar with two sliders. Just next to the bar, the percentages are displayed so you don’t need to guess how much you’ve moved the sliders up or down. If the numbers aren’t enough, you can always go to the preview and see firsthand how it looks from the frontend.
Advanced settings
Advanced settings are focused primarily around exceptions to the setting we’ve just covered. The first two options, we already touched upon, represent the size of a screen for which the element won’t stick. You’ll get to define the smallest size below which the element will have its default positioning and the largest size above which it will do the same.
For general use, this is all pretty much covered in the visual settings with the four default sizes, but if you feel like you need a bit more control over the sizes, you can get it here.

A push-up element can also be assigned in much the same way you already used for the sticky elements. These are usually footers or lines with social media icons. All this feature does is push up on the invisible line between the sticky element (usually on top) and the push-up element (usually on the bottom). You can create a nice effect using this and at the same time make your display less crowded.
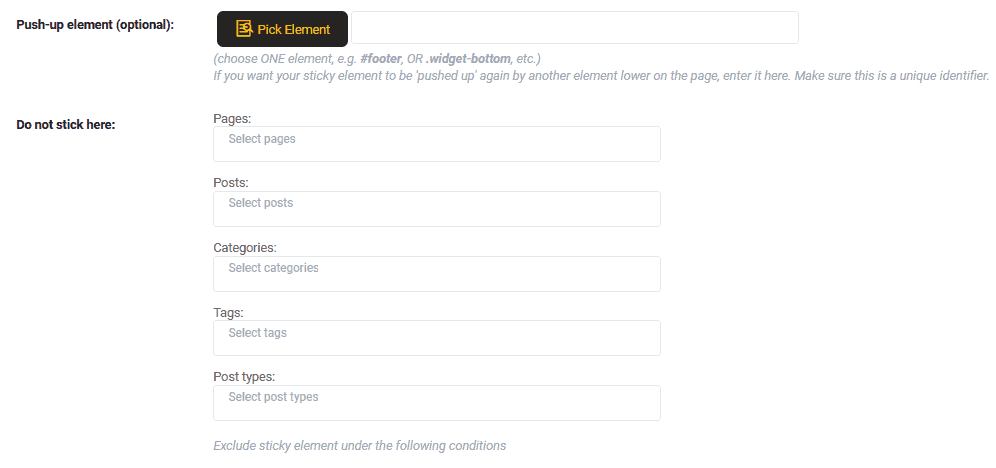
The last option is again about exclusion, not regarding screen sizes, but rather sections of your site. You can choose where the element you’ve designated to stick, doesn’t. These can be specific pages or posts, entire categories, unique tags, or post types.
If your site is so diverse that a sticky element is needed only some of the time, or if you’re using multiple sticky elements that don’t go on every page, it’s good to have an option that lets you turn things on and off automatically.
Advanced options – modes
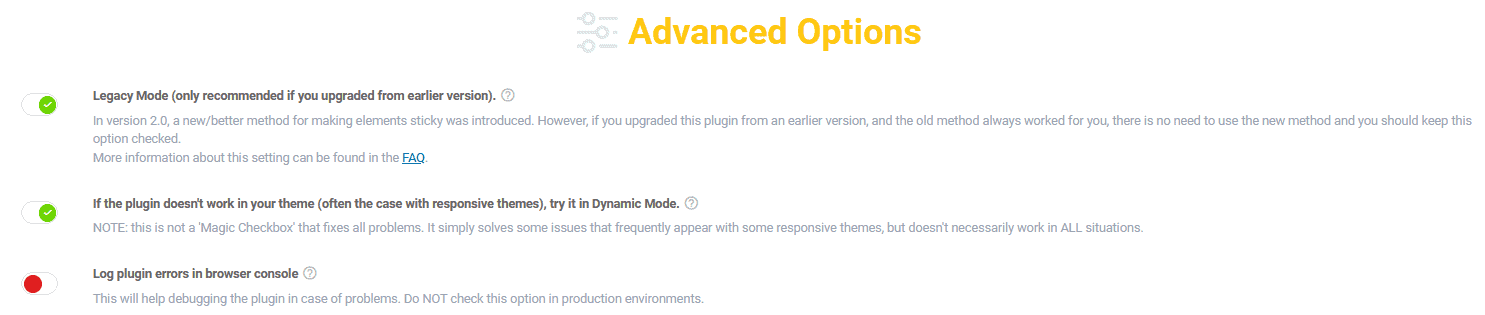
Not to be confused with the advanced element settings that were just mentioned, the advanced options focus on general plugin behavior. Most users won’t ever use them, but for outlier cases, they could prove valuable.
You can activate three modes, depending on what you need.
There are the Legacy mode and Dynamic mode that work for older themes that haven’t kept up with current features and trends. A lot of technical stuff can be found behind these two modes, but essentially the plugin is reverted to an earlier version.
Aside from these, you can also log plugin errors in the console. WP Sticky works seamlessly with pretty much all current themes and plugins but if you ever encounter issues, you or someone you’ve delegated the task to can get additional information about what’s causing them.
Conclusion
WP Sticky is a specialized tool that does its job extremely well without much fussing around. So if you want to make sticky elements, customize and organize them throughout your pages you’ll be able to do that quickly and easily.
Even though it’s aimed at newcomers because of the way the user interface is handled, you can confidently keep using it even after you’ve gained some knowledge without diminishing returns.
Thanks for artikel