We’re all traveling all the time. When you’re a kid, it’s as simple as going to summer camp through your school or visiting attractions like Disneyland with your parents. Once you’re older, this is replaced by class trips to Europe and taking a year off to see the world. In college, you’re counting the days till spring break, and after you’ve gotten a job and started a family, the circle starts over, only with different roles.
The point is, most of us are part of this upbringing where traveling is common, and by the time you’re in your mid-twenties, there’s a high chance you’ve visited your share of destinations.
Not including business trips (even though most of those can serve a similar purpose, sort of), traveling is a way for us to unwind, meet new people and experience new cultures.
The way you experience these things can now very easily be documented, and again, most of us do so through photos, videos, and yes, even postcard. Several free video maker tools can help you achieve this. Since sharing everything you’re doing is easier than ever, why not put all that material in one place and start a travel blog. It can easily start off as something small, documenting your travels for yourself more than anyone else (a form of a diary, if you will). But, it can also grow into a business you can ultimately live off of.
While the tools to create a travel video or a travel blog (or any blog for that matter) are more accessible than they’ve ever been, it’s still prudent to set it up on a sound foundation, especially if you want it to grow to the point where it is viewed as a business down the line.
By the end of this article, you’ll know in what order to check things off of your list and what aspects require special attention. We’ll look to break everything down to feature all the required steps in the process so even those that are far removed from the field can still comprehend this guide and, more importantly, use it for their projects.
Hosting

Before you embark on your epic traveling and blogging adventure, the first thing you need to equip yourself with is a hosting platform. The market for hosting services has expanded greatly along with the rapid growth of the number of sites online, so there is no shortage of options. However, quality choices are few and far between, so even though you could go the free, or at least freemium route, we urge you to consider subscribing to a superior solution.
A paid solution makes that much more sense when you know that this will be your main expense relating directly to the blog and is a small fraction of your overall traveling costs.
Going with a subpar solution could cost you more in both money and time in the long run.
Keeping that in mind, we’ve decided to single out three top solutions that offer great features but still won’t leave your wallet dry. Furthermore, each of the highlighted platforms comes with an automatic or one-click WordPress installation. WordPress is, as you might already know, made for blogging – the whole open-source structure is ideal for the format, and it shows. Namely, WordPress is the most commonly used platform today, not just for blogs but also any type of site. It’s, therefore, safe to assume you’ll be using WordPress for your blog as well and create our guide around that assumption.
We’ll go into much more detail about what to do once WordPress is installed, but for now, let’s focus on just hosting.
It’s crucial to note that there should be absolutely no compromise regarding uptime. The importance of your site being live all the time cannot be emphasized enough, so look only for solutions that guarantee 99,9% uptime. You can’t be offered anything else that even comes close to the importance of perfect uptime. Don’t get distracted by bells and whistles you can do without, and choose wisely.
Disclaimer: The services listed are in no particular order; each of the three is a high-end option.
DreamHost
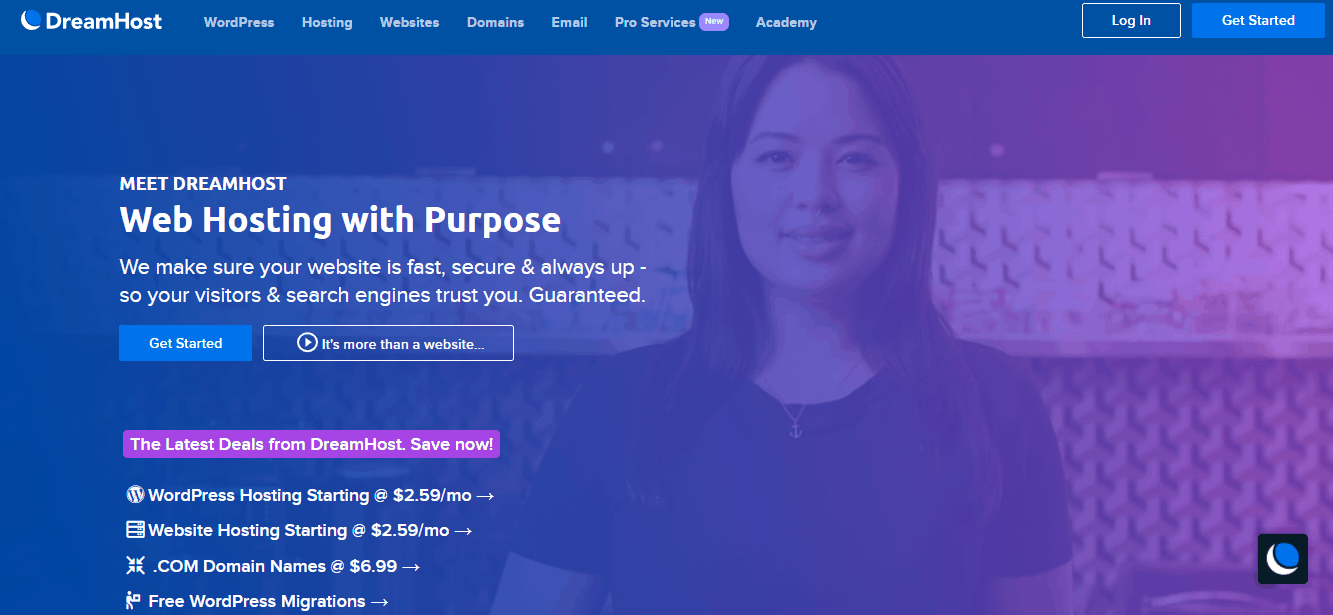
DreamHost is optimized to work best specifically with WordPress-based sites/blogs to the point that they’re even listed as a recommended host by the WordPress.org site. As such, it’s exactly what we’re looking for in a hosting service that will help us get off the ground fast. The great thing about DreamHost, other than the WordPress optimization we’re looking for, is the extreme flexibility when it comes to various plans, tiers, and add-ons. The basic WordPress hosting package, for instance, starts at just $2,59/month.
So, if you’re unsure whether a travel blog is something you’ll continue working on, this is the perfect entry into the travel blogosphere. Once you have the core package set up, a plethora of possibilities open.
The hosting infrastructure includes selecting from dedicated, cloud, VPS, or shared hosting – each of them having a distinctive place in the natural evolution and growth of your blog. If you’re having trouble comprehending, don’t sweat; usually, the more something costs, the more you get out of it. For example, shared hosting is the most affordable, but resources are shared with others on the server, so when your blog grows in popularity, speeds could falter if traffic gets dense. On the other hand, dedicated hosting (in any format) ensures your blog’s speed and stability.
All hosting options come with free SSL, SSD storage, and unlimited bandwidth.
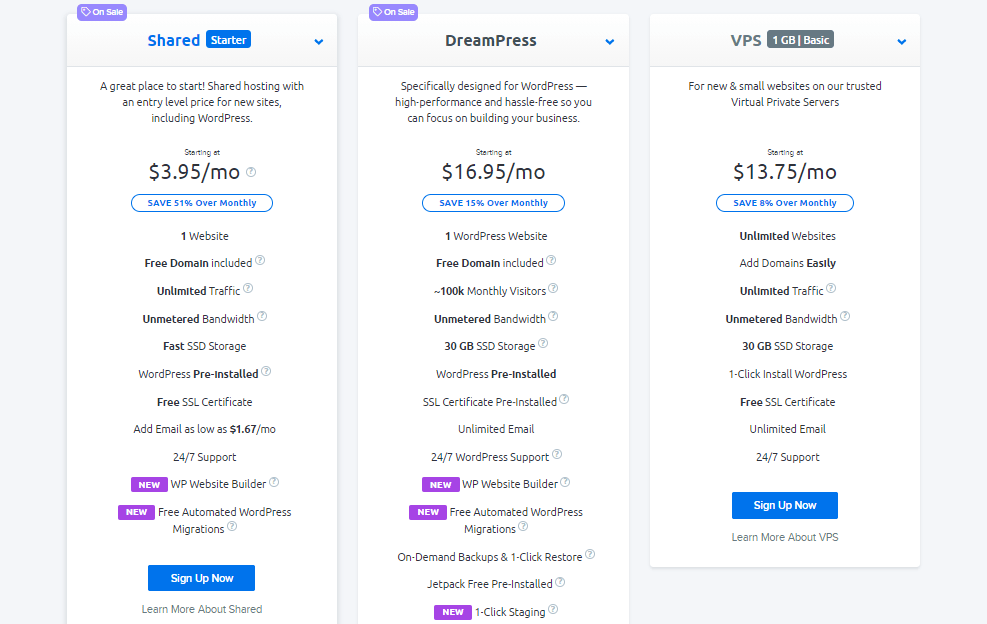
Other interesting additional features include a drag-and-drop page builder, creating a domain, and open-source solutions, just to name a few. Some of these you could get regardless of your hosting service. Visual page builders, for example, can be found everywhere you look nowadays. Still, some are connected directly to your hosting service.
Since we’re writing this guide based on the assumption that this will be your first blog, migration options aren’t that big of a deal yet. However, it is worth noting that DreamHost doesn’t offer free migrations, so if you’ve created a blog somewhere else, you’ll have to pay a one-time fee to transfer it over to DreamHost.
For a full rundown of their pricing list, we urge you to check out their official pages and see what they’re offering.
Bluehost
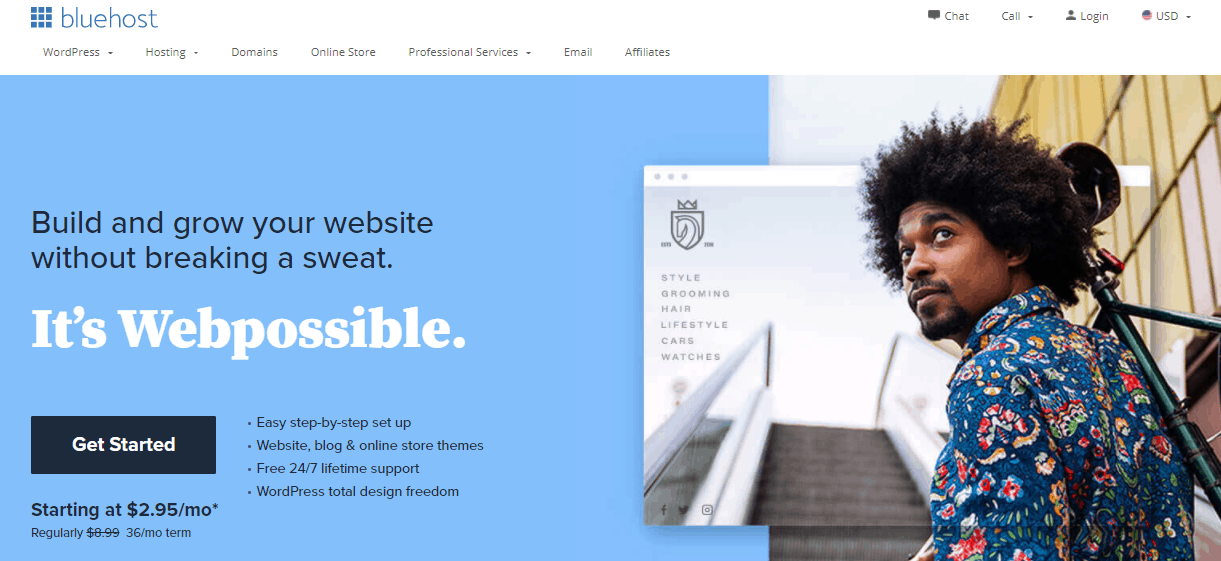
Bluehost is another hosting service optimized specifically for WordPress that WordPress.org recommends. If you’ve ever done some research on hosting, chances are you’ve stumbled upon Bluehost because it’s one of the most popular services around when WordPress is concerned. The reason for this lies predominantly in the low entry fee of $2,75/month that enables everyone to give it a try; plus, there are numerous options you’ll be able to switch to as your site expands and traffic becomes higher. You can additionally use a Bluehost coupon that can further reduce the monthly cost of hosting.
It’s worth noting that even in the basic plan, Bluehost offers a free domain and SSL certificate for the first year, which you’ll most likely have to pay for if you go for other services.
Hosting can be shared or managed, and there is even a special option designed for online stores that use WooCommerce (useful for if you ever decide to incorporate selling products into your blog). For starting out, the basic plan is definitely the one to use.
Apart from the basic hosting services, you can also opt to add features that can enhance backend functionality like SEO tools, additional security measures, etc. The entire premise is based around SEO (or Google, to be exact), with features that enable you to maximize your exposure to the preeminent search engine around.
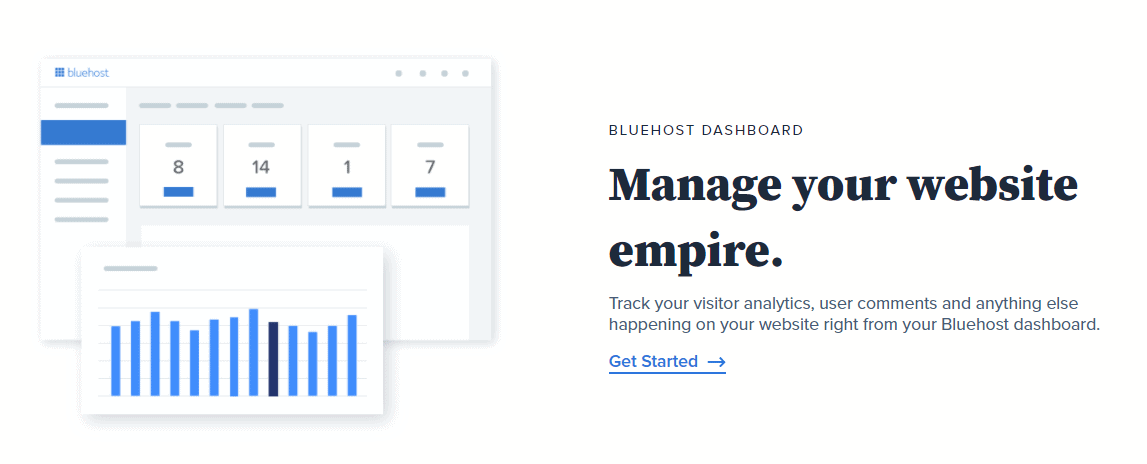
Through the Bluehost dashboard, you’ll get to create and manage your Google My Business profile and optimize your Google ad campaigns. Now, of course, these won’t be features you’ll be using that much in the beginning, but if you start looking at your travel blog as a business down the line, you’ll need tools like these to help you stay on top.
Working with WordPress is quite simple because of its open-source nature to the point where you can potentially activate a plugin for every action you might need. However, if you’re unsure about anything in the creation process, you can contact the support team and get one-on-one guidance. Plus, if that’s still not enough, for a fee, the design team will take over and create a site for you. Before you delegate the work to their team, however, you really should try and get something out of the numerous themes available to you in every plan and create something entirely your own.
Unfortunately, migration isn’t free for the lower-tier subscriptions, so you’ll have to pay a fee if you’ve started your blog elsewhere and want to switch to Bluehost (migration is included in some of the higher-tier subscriptions), but again, this shouldn’t be a deal-breaker since you’re just starting out.
For a more detailed look into Bluehost’s subscription plans, features, and payment options, we urge you to visit their official pages.
HostGator
HostGator isn’t that much different from the two previously-mentioned solutions. Once more, we’re talking about a very popular hosting provider that’s been around for a while. Its entry cost is also similar to the other options’, with the Hatchling plan (basic tier) costing $2,75/month. Within this basic plan, you’ll get a tad bit more than you would elsewhere. Included is a free domain registration with an SSL certificate, unmetered bandwidth, unlimited storage, and even one free migration. This means that switching to HostGator will be the most affordable option of the highlighted three if you’ve started your blog on another hosting service.
The features provided don’t scale just according to subscription plans but also your own knowledge and chosen level of involvement. For example, SEO tools and cPanel access are available for advanced users but not necessary for those who don’t want to get into that. Furthermore, if any of these components ever falter, a great support team is there for you 24/7.

Outside of the features HostGator provides, its real strength is in the fantastic infrastructure that provides some of the best performance metrics seen in any hosting service on the market. Both its uptime and load time measure at the top, no matter what hosting service’s uptime and load time you compare them to.
The slight downside is a somewhat higher renewal fee (after your initial subscription ends) compared to similar services. Still, by that point, you’ll probably already be generating enough money through your blog that the increase of the fee won’t even be noticeable.
As usual, for the full subscription plan list, check out HostGator’s official pages.
Choose a name
Before using WordPress and getting down to the real work, you’ll need to figure out a name for your blog; you’ll set up your domain through the hosting service, most commonly, using a wizard that simplifies things immensely.
A quality name is very important on many levels, from how quickly your blog will reach your potential audience to ultimately your SEO score.
While there is no universal formula for getting the perfect name, there are some guidelines that prove prudent to follow:
- Keep it short – this isn’t a dissertation with a title that is two sentences long; you should keep the title at up to five words, and even that is stretching it.
- Be unique – there are a lot of blogs out there; a catchy, unique name could set yours apart both overall and with search engines.
- Don’t limit yourself – it’s important to keep your options open. What you start blogging about might not be what you end up blogging about in the future. For instance, calling the blog “An unguided tour through eastern Europe” limits you geographically, so if you have to switch up your traveling for any reason, the name will be a hindrance.
- Social media – because social media is such a huge part of marketing nowadays, you’ll need to research your name’s social media potential. If there are similar names already out there, try something else to avoid any confusion.
Setting up your WordPress blog
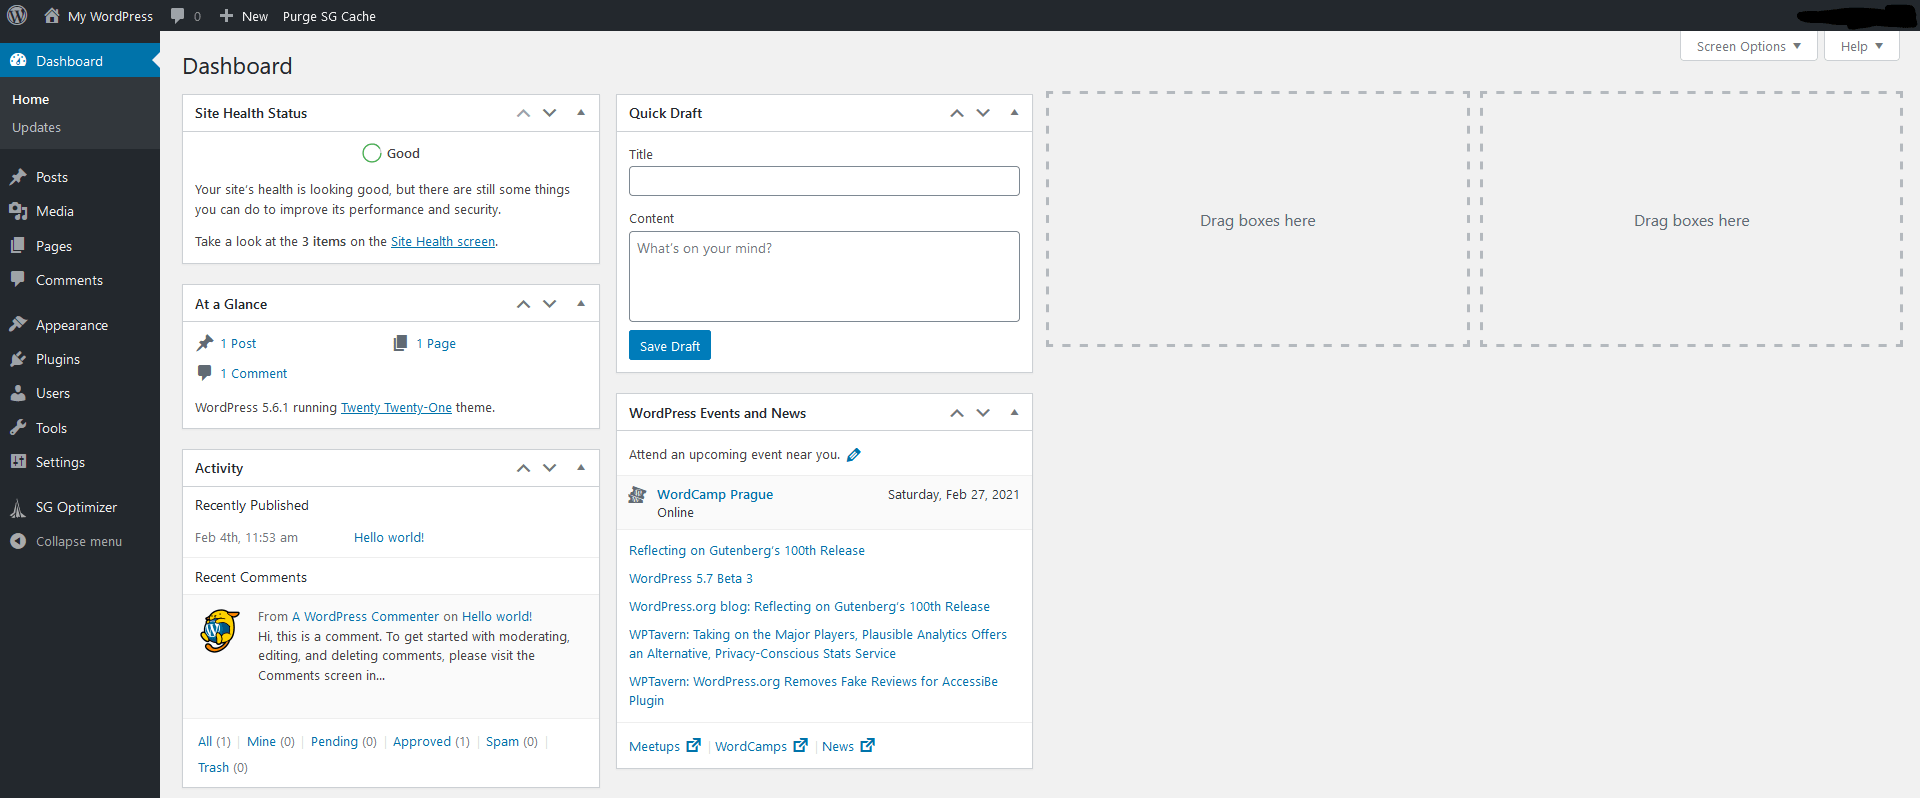
As we’ve pointed out, the WordPress installation itself is done automatically through your preferred hosting service, so there’s not much to add to that. You’ll have to decide on a couple of placeholders just to start up the platform. After that, you’ll have your first look at the WordPress dashboard, where you’ll spend most of your time when working on the blog.
The default dashboard will look a lot like this.
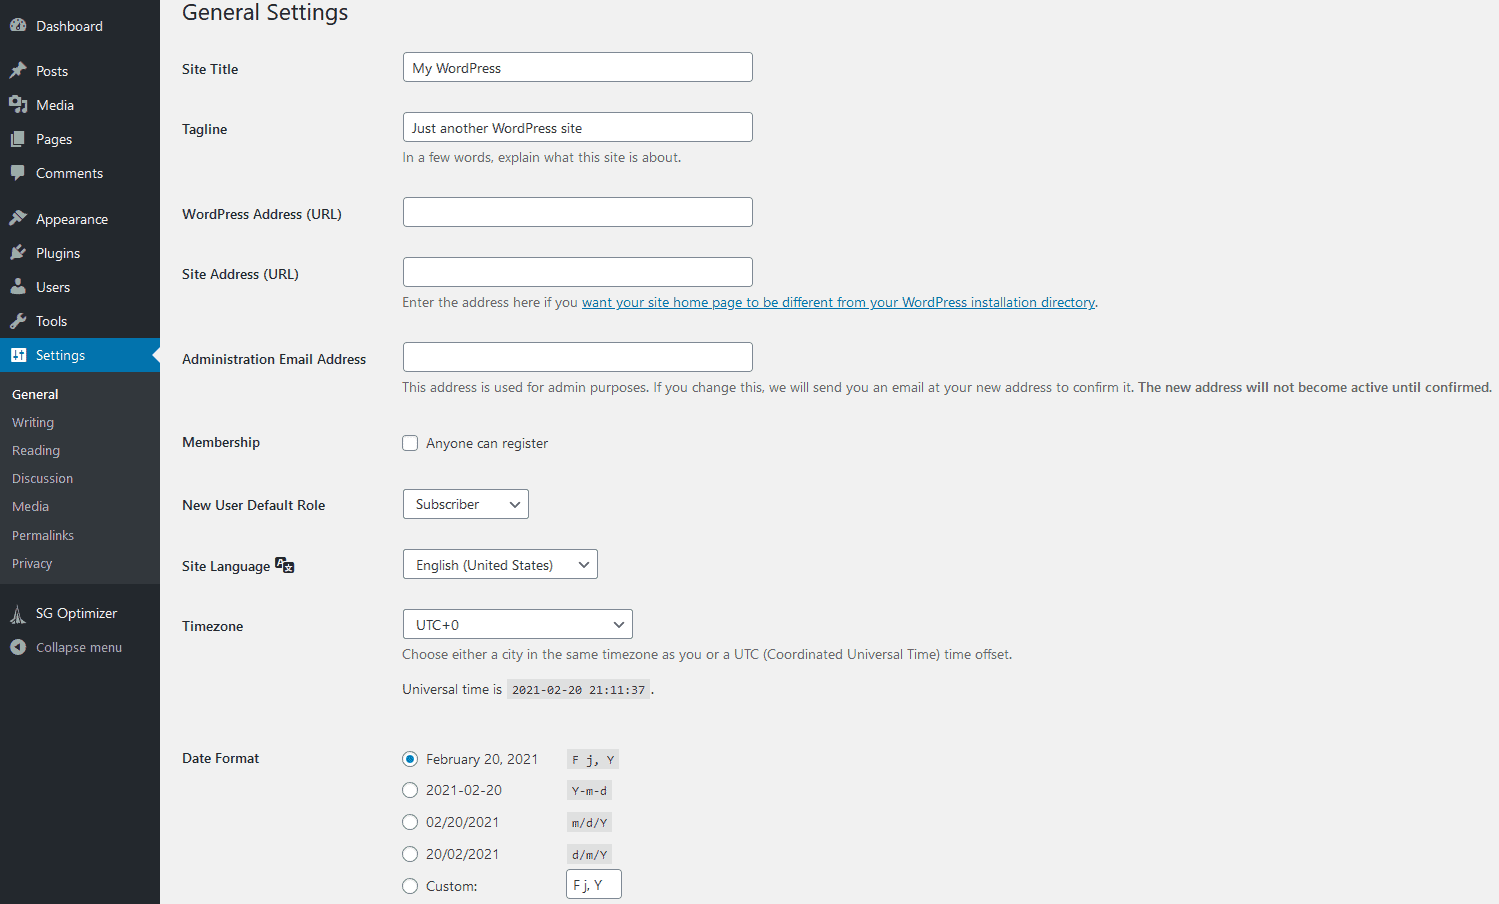
General settings
From there, you’ll have some obvious first decisions to make regarding how your blog pages are displayed and how elements work. These are just the general settings, and even if you don’t have an idea of what to aim for, most of them can be left on the default value, and you’ll be just fine.
Some, however, really need to be addressed – first of all, your site name and tagline. As you would expect, it should be the same name you already created for your domain. Additionally, if you want your blog to be localized, you can change the language, time zone, along with the date and time format. In case you’re unsure, everything else should remain unchanged.
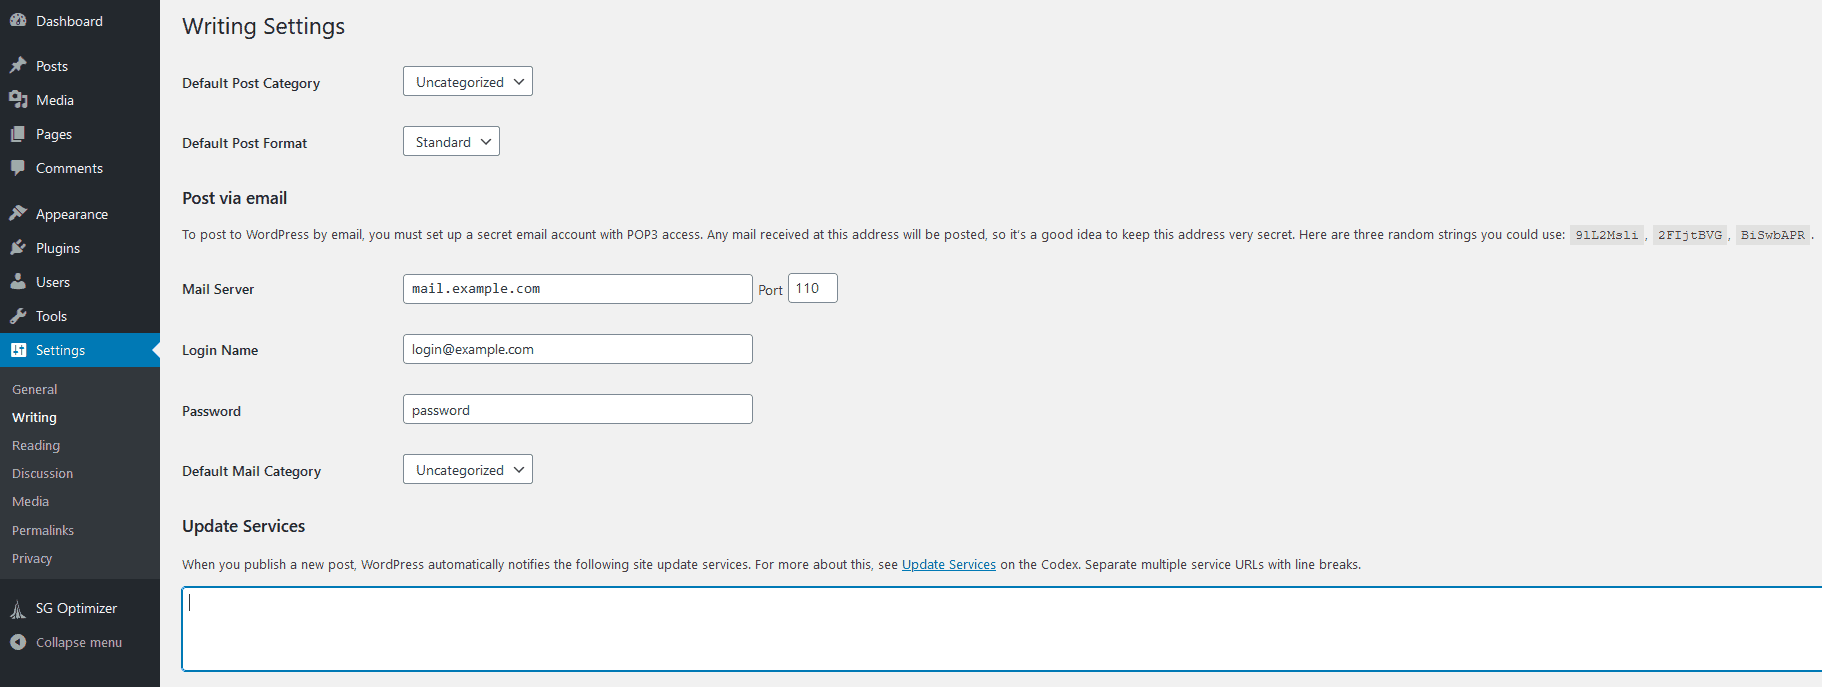
Because your main occupation with a blog is writing, it stands to reason you can change some of the writing rules. For starters, you can set up the default post category and format. In the beginning, you probably won’t diversify as much, but later on, as your content gets more varied, you can go back to this point and set up the default rules.
Furthermore, in case you know you’ll be using email to post (without having to log into WordPress at all), you can set that up as well. This can represent a viable security blanket in the long run.
Similar to the writing settings, you can also modify the reading settings. These are simple actions that determine how your posts will be displayed on the frontend, i.e., how your visitors will perceive them. The default rules are common on most blogs out there, so if you want your blog to adhere to the non-official standard, leave these settings be.
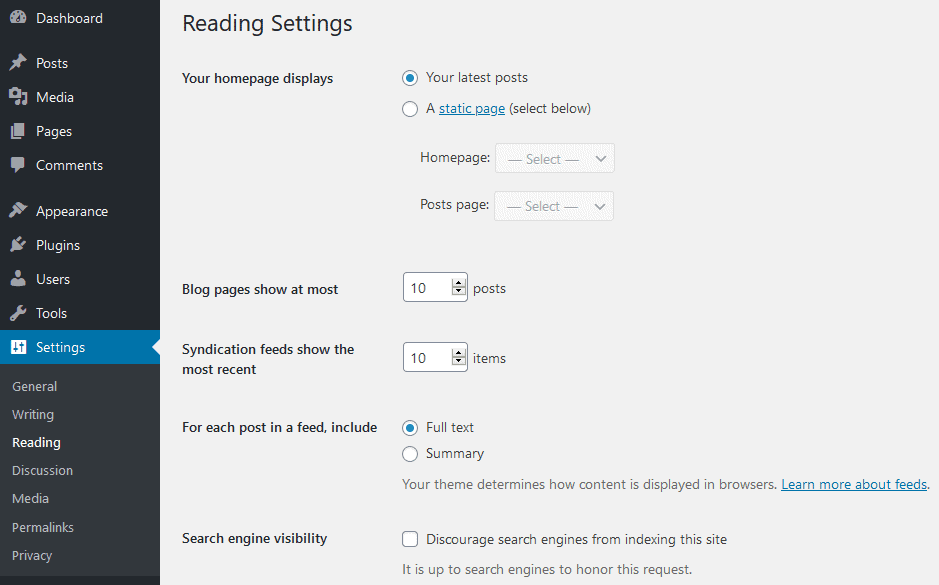
The next section is also related to your visitors, more precisely their interactions with you, the content provider, and others in the community. Most of the rules are rather straightforward, and you’ll be able to set them up in a flash (if you even want to change something, that is).
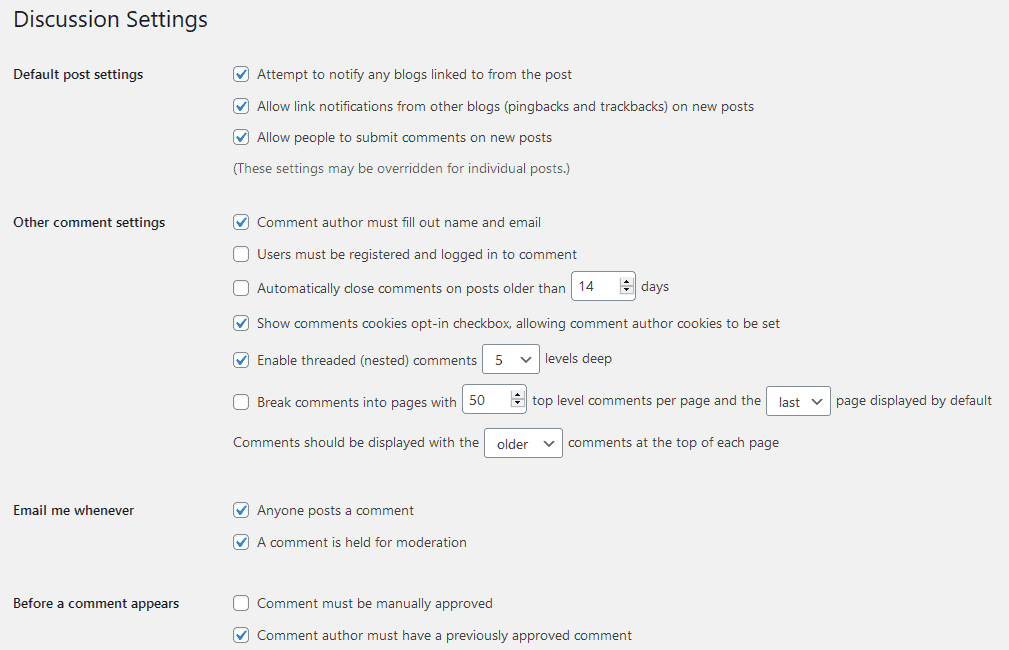
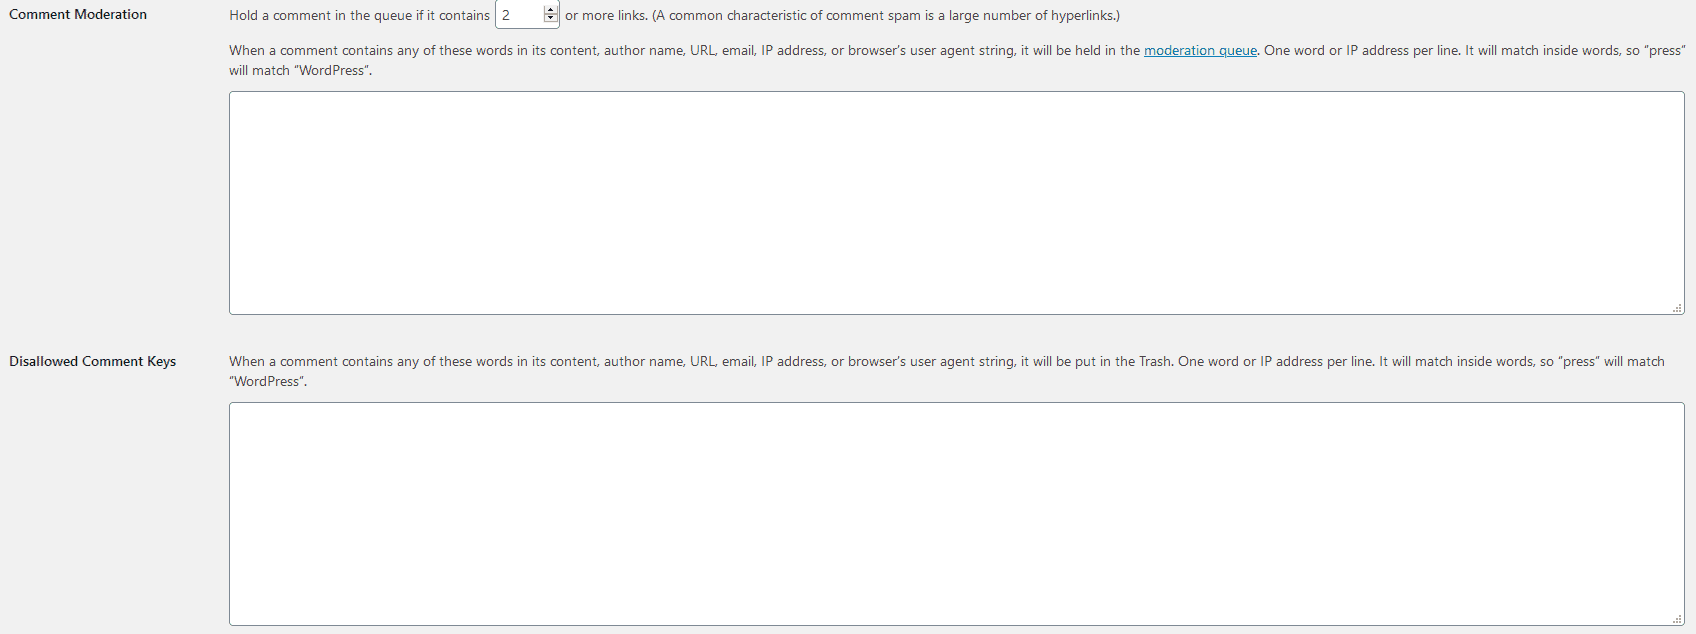
However, comment moderation requires a little bit more thought. If you find that certain links, words, and/or phrases have no place beneath your posts, or if you’re constantly bothered by spam, you can seriously limit the flagged comments.
Finally, you’ll need to determine how your visitors will be displayed. Once again, the avatar section is rather self-explanatory; there’s a rating section akin to the ESRG method and an avatar section where you can enable/disable them and set default ones for those that don’t upload their own.
![]()
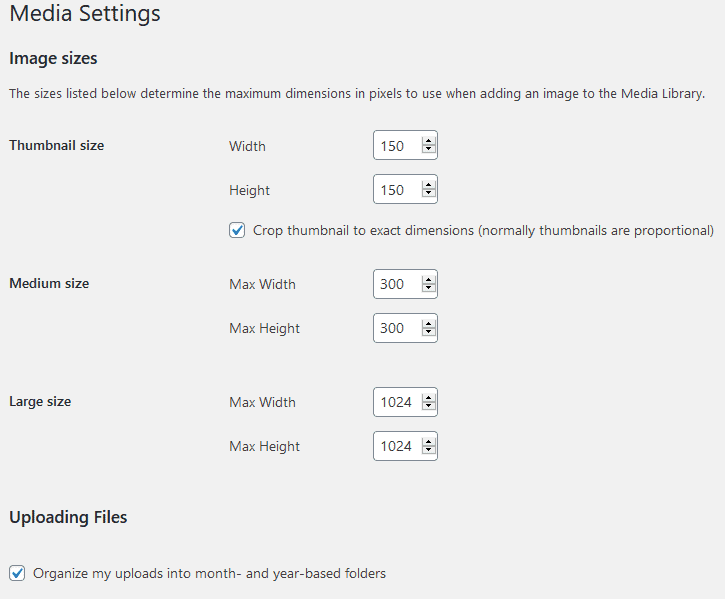
Moving right along, we get to the media section. Since you’ll probably be posting a reasonable amount of photos and potentially videos, it is important to define how all that media will be displayed.
In the general settings tab, you’ll also find the permalinks and privacy section, but those include settings you shouldn’t bother with when you are just starting out. Down the line, if you want to change something, feel free to do so.
Appearance/Theme
You’ve finished the “technical” portion of the setup, but now comes the equally important (if not even more so) “visual” portion that will determine how your blog will look. The main decision to make here is what theme to go for. There are a few initial, preloaded themes you can choose from, but honestly, this is one of the things you should really explore until you find the perfect one – it’s that important.
Around the web, there are lots of themes, whether free or paid, so you’ll be able to eventually find exactly what you’re looking for.
Keep in mind that spending some of your budget on a theme is not money wasted – a good theme will attract and retain visitors more than you know.
You can go about adding a theme to WordPress in a couple of ways – download it from a third party and then manually move the theme to the WordPress directory for activation; download it onto your WordPress website directly (not all themes support this method); and most notably, just click the “add theme” button in the themes section.
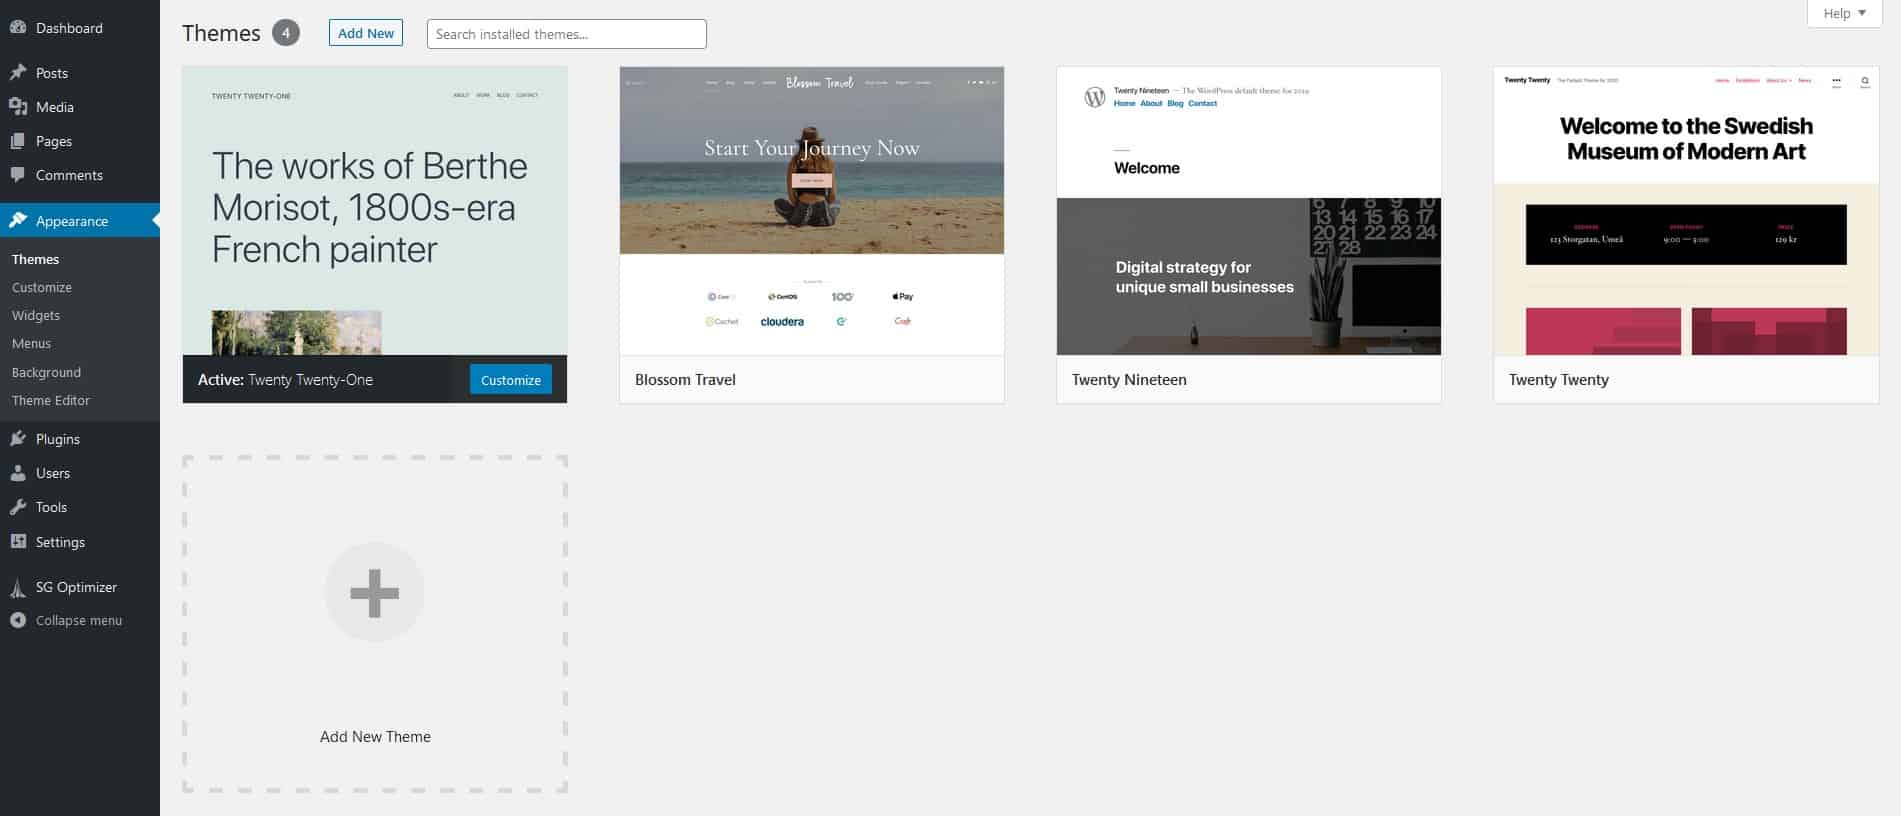
After the theme has been downloaded, you can activate it right away, or you can choose to preview it first before making any changes.

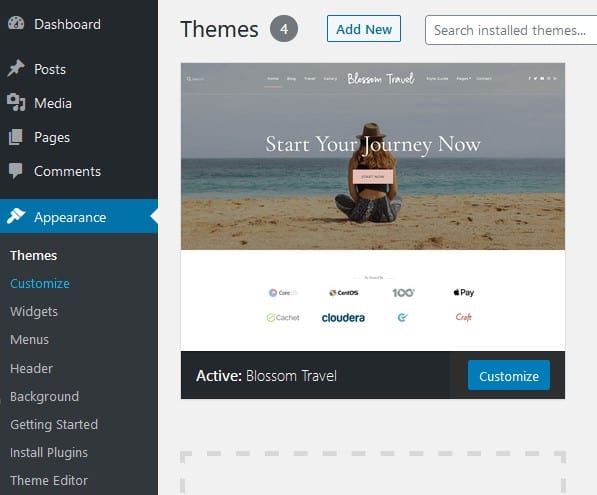
As we said earlier, there’s an immeasurable amount of themes available out there, yours for the taking. To ease the process of finding the right one, we’ve come up with a great suggestion – Blossom Travel. This is a theme designed specifically for travel blogs, so the overall look and feel of your pages will practically scream “Traveling!!!”. Blossom Travel doesn’t just look good; it’s search engine optimized as well as speed optimized and features all social media integrations you would expect.
The important part to highlight is that all themes (including Blossom Travel), although made to work right of the gate, still come with vast customization options and can be used as advanced templates from which you can then create your totally unique theme.
One of the first things that we noticed after activating the theme is the “getting started” section that aims to help those just starting out with useful tips and a list of recommended plugins to use with the theme.
Here you’ll find out a bunch of things you might not have known beforehand that will jump-start your blog faster.

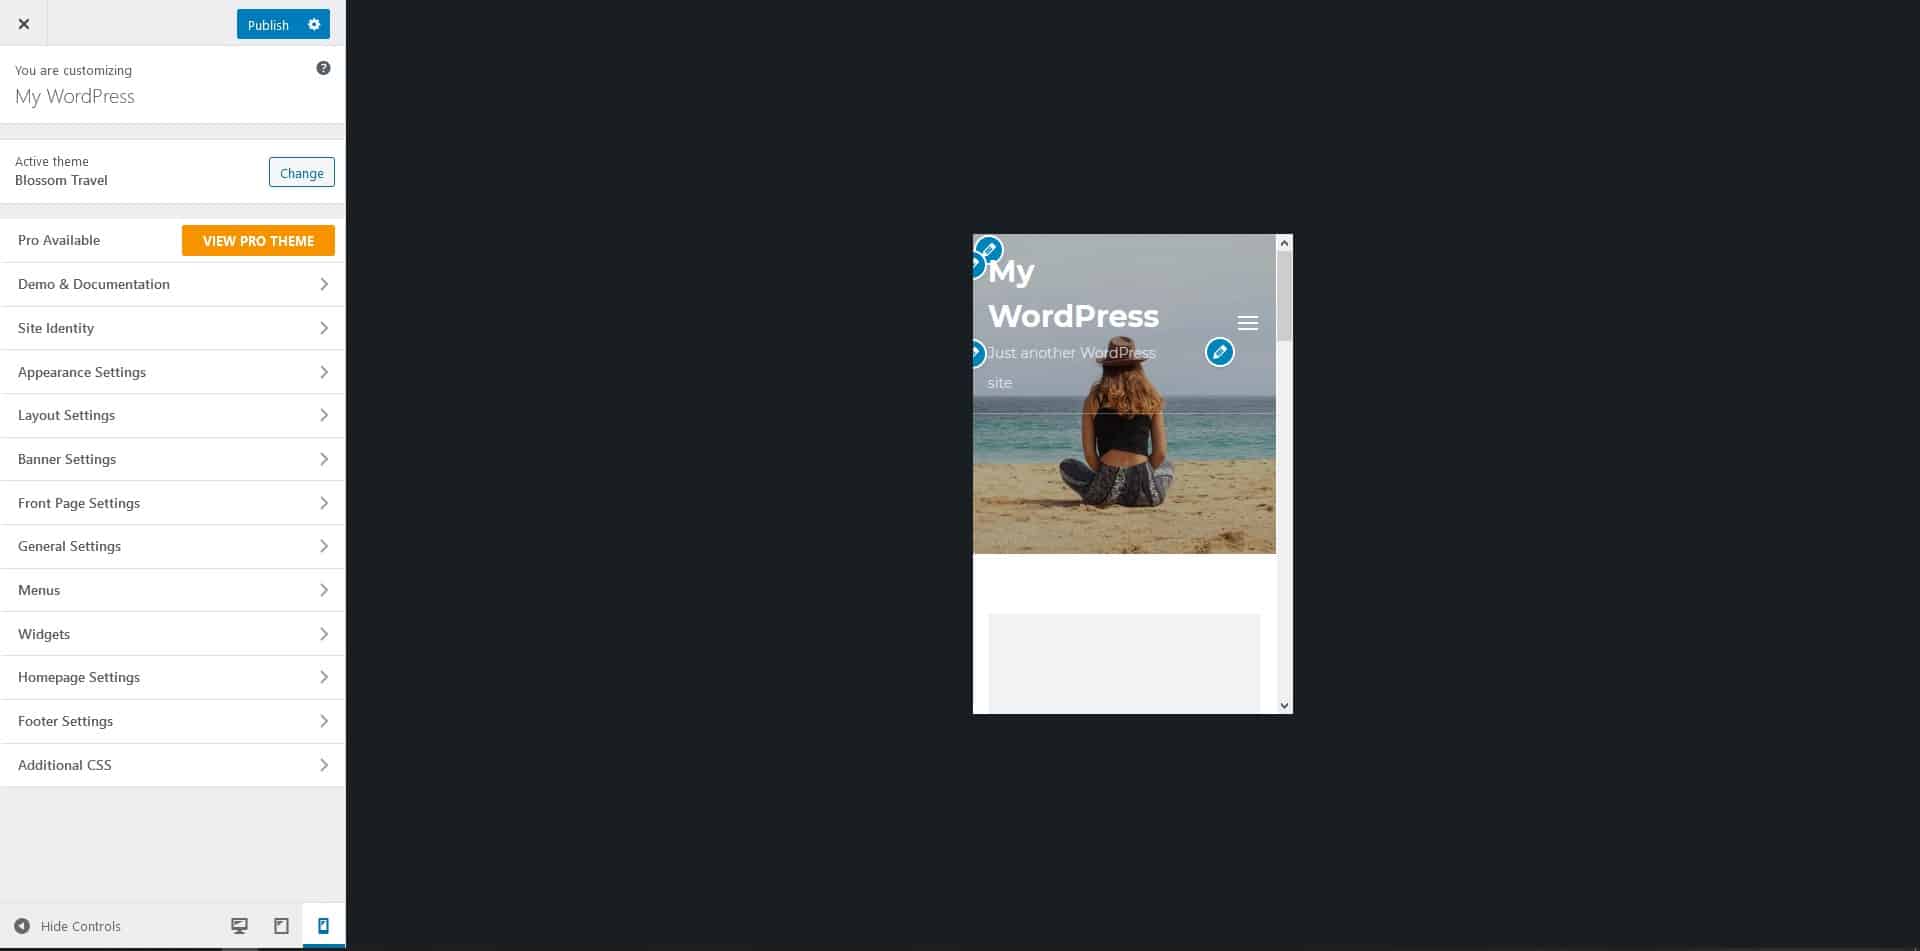
After you’ve gone through all the suggestions, it’s time to start the real work of adapting the theme to your needs and wants. To start things off, you’ll want to look at the customize option in your dashboard’s left-hand side menu.
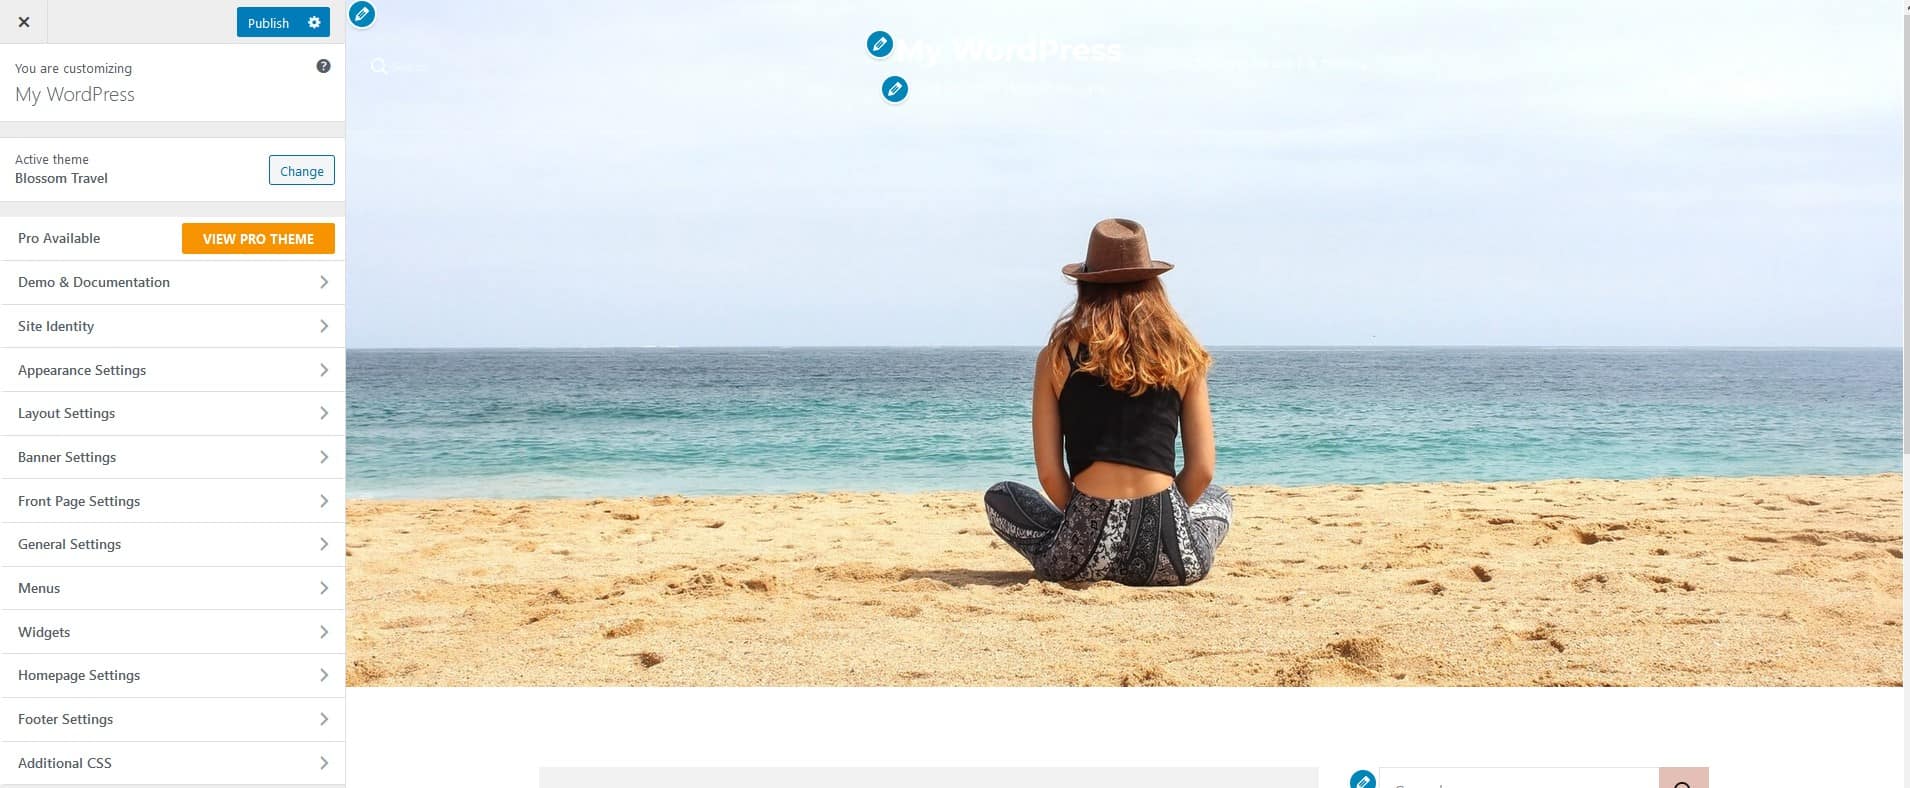
This option will take you to the theme editor, where you can mix and match every element (and their attributes) that will be present in the final layout. Once more, the selection menu can be found on your left, while the main preview window takes up most of the space on the page and is where you can see the changes after they’ve been made.
The first few fields are there to provide you with information. Right on top are your site/blog name and the active theme. Since Blossom Travel is a free theme that has a pro version, there’s also a third field that redirects you to the theme’s homepage where you can upgrade it, but more on that later.
Additionally, the Demo and Documentation field also redirects you to the theme’s homepage, only its different sections.
Lastly, there’s a field named Site Identity that lets you modify the site title and tagline. However, if you’ve been following along with us, you’ve already done that in the general settings section.
With those perfunctory fields out of the way, everything else from now on will be directly related to the numerous customization options for theme modification, so let’s get into them.
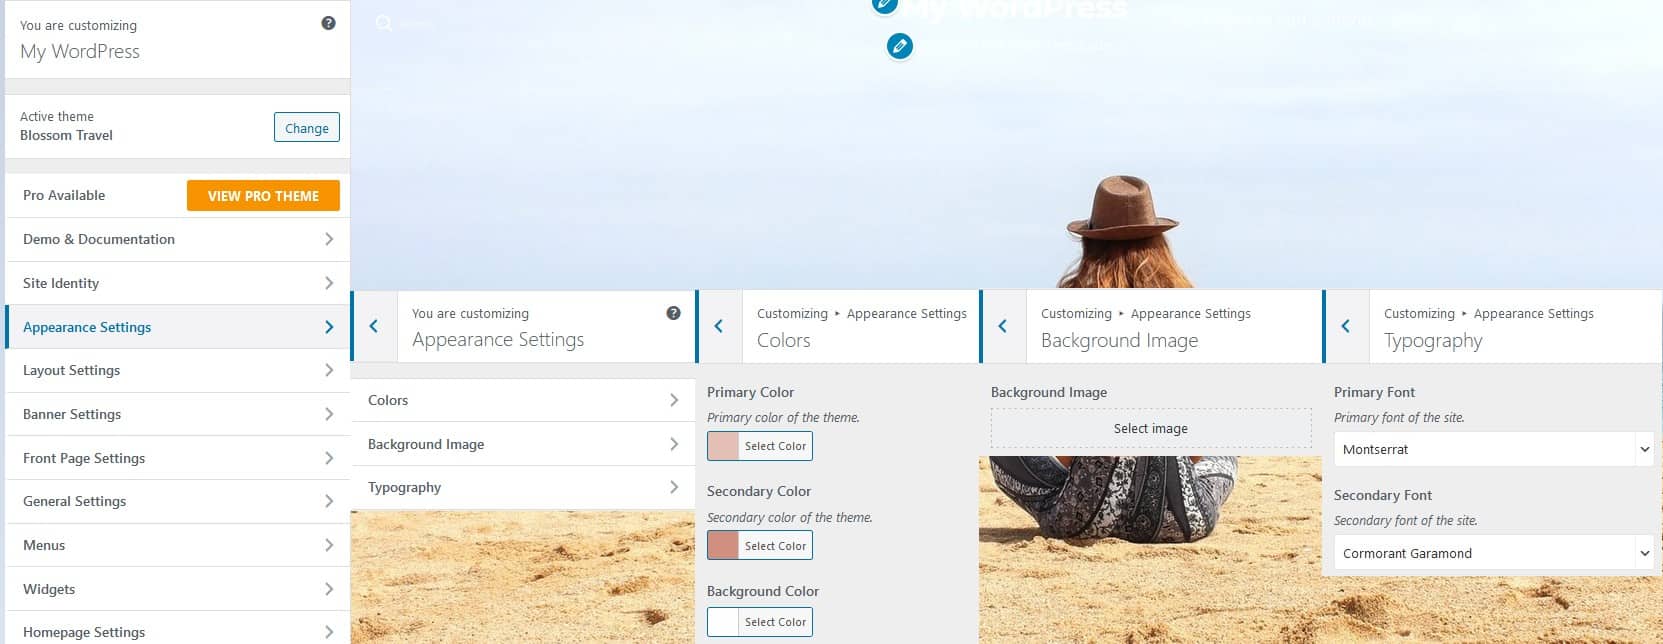
Suppose you’re looking to change the background image (by uploading a new one or choosing one from your library), color scheme, or typography (main and secondary font). In that case, you’ll be using the appearance settings. The default setup is made to fit perfectly, but if you feel like you can create something better, don’t hesitate to give it a shot; just be sure to preview everything before going through with the changes.
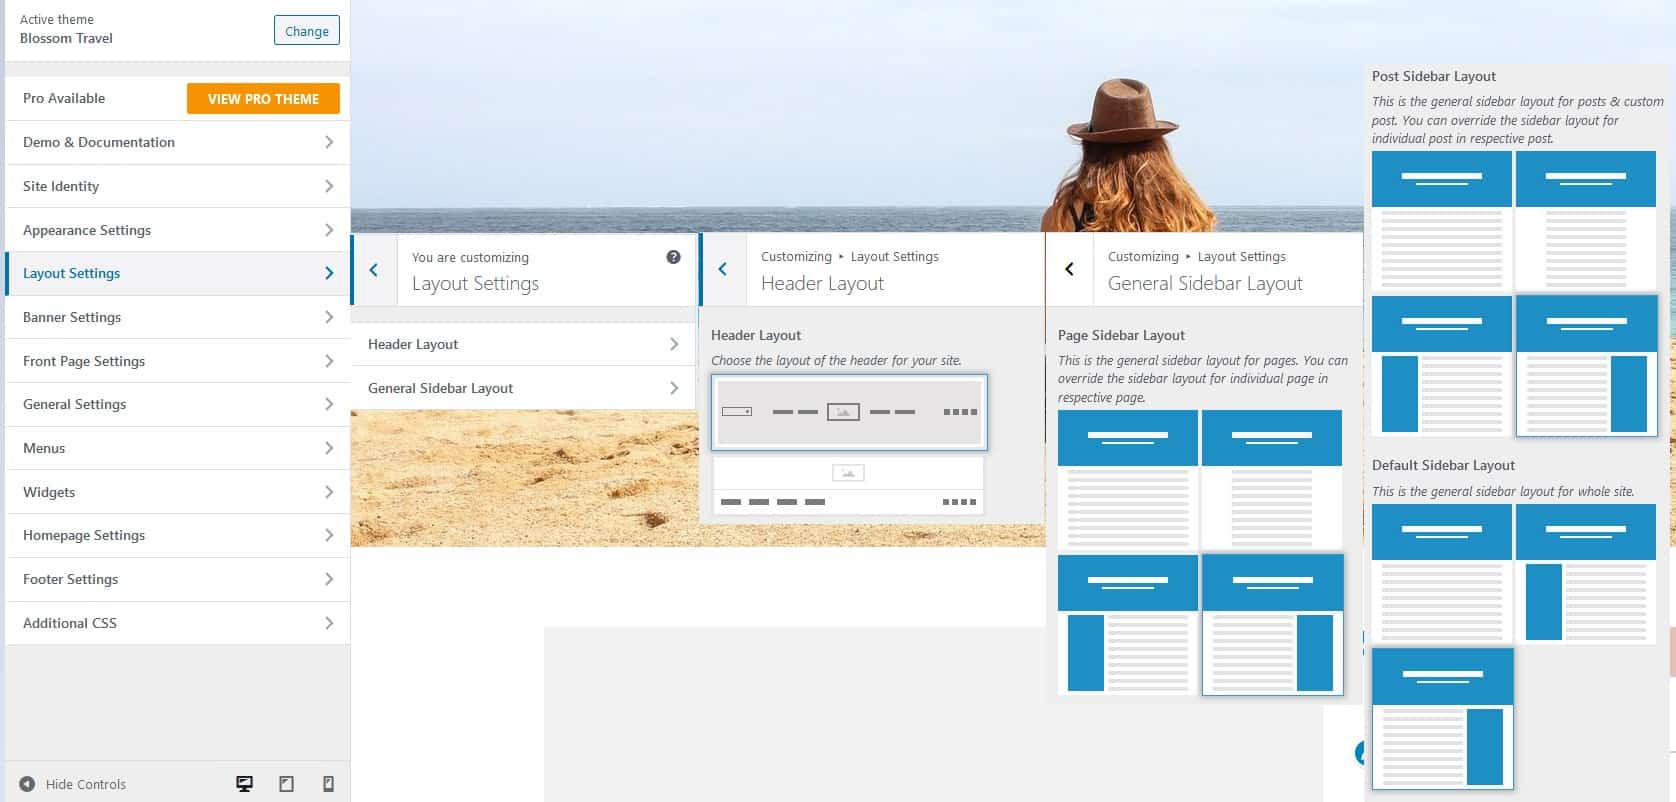
With your overall look set, you’ll need to figure out the basic layout of your pages. Based on how much content is present in certain sections, you can rearrange the header and sidebar layouts (for the entire blog or separately for posts and pages) to work with the overall feel of the theme.
The theme’s free version offers limited options, but you can easily upgrade to enable more if you need additional layouts.
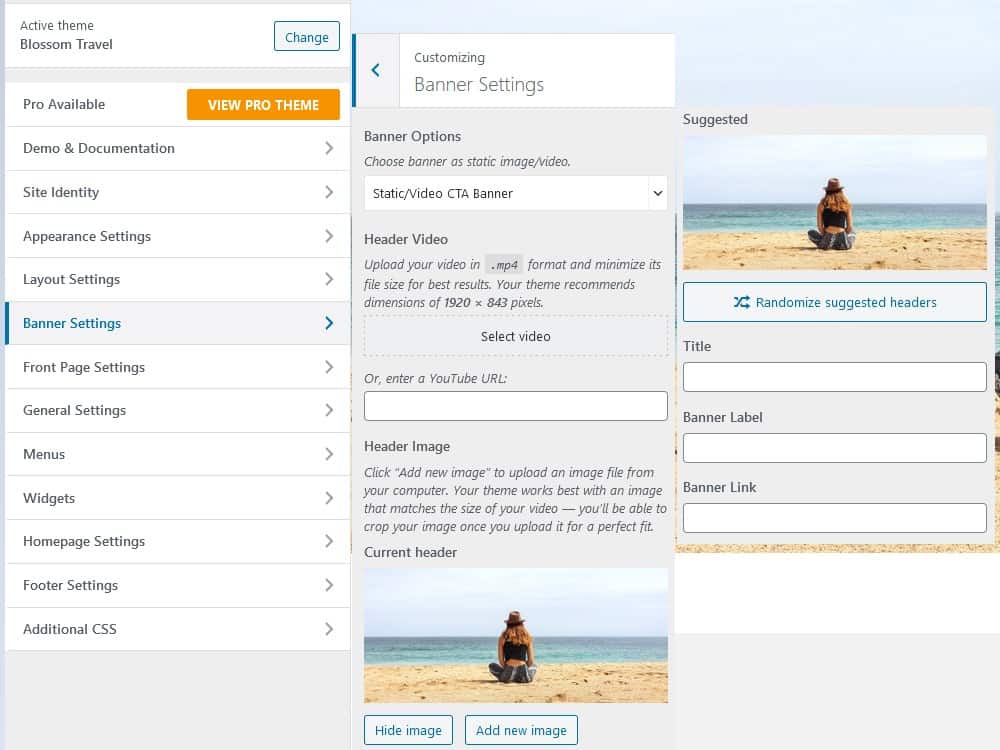
Not every blog needs a banner, but if you’re using one, you’ll have to determine how it’ll look and whether it’s going to be a static image, or a video (in the free version) and maybe posts and categories, or custom content (in the pro version).
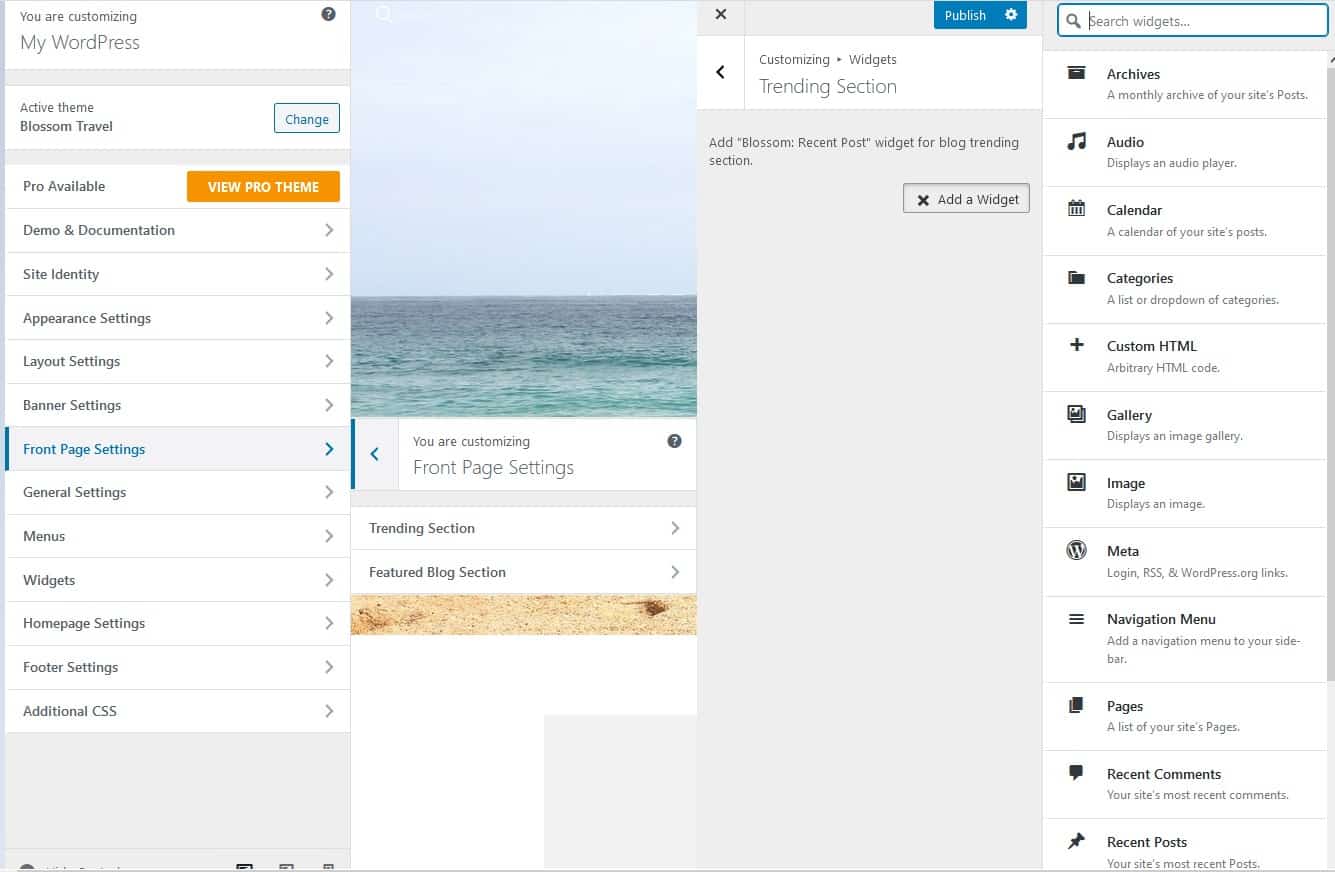
The trending and featured blog sections are unique sections that can be added to your front page. These both represent widgets, either default ones like a calendar, a video, a dropdown list of categories/pages, or a widget added through a separate plugin.
The sections aren’t exclusive, meaning that the sections pull from the same database, and it’s up to you to pick which one goes where. Additionally, you can use the widgets made specifically for the theme that come in the pro version.
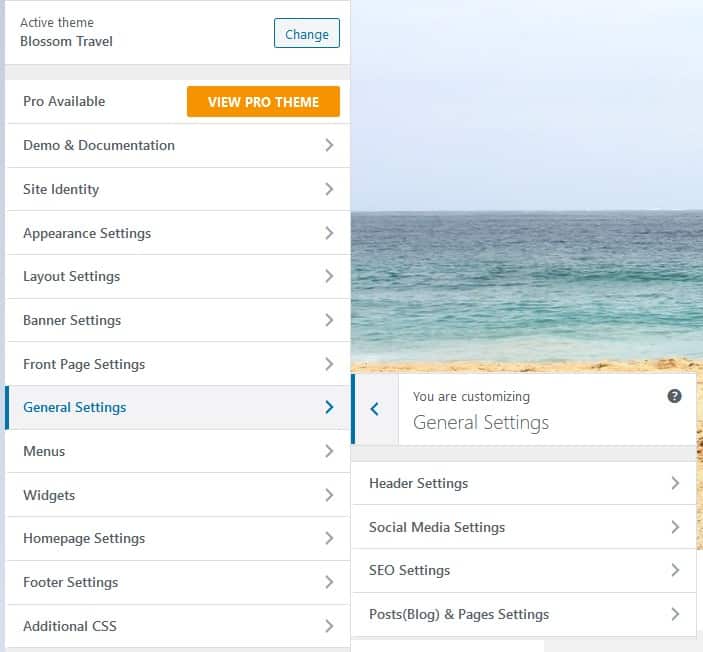
The general settings are similar to the ones we’ve already gone through while accessing the WordPress dashboard for the first time, with the main difference being that these pertain to the theme, not the functioning of the whole blog.
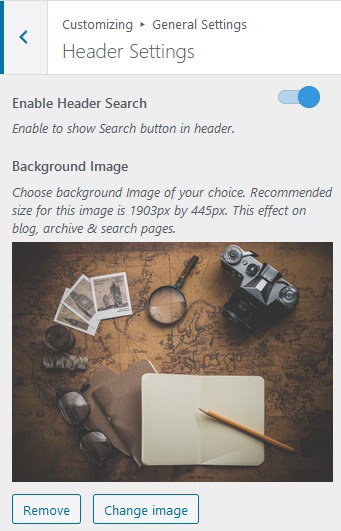
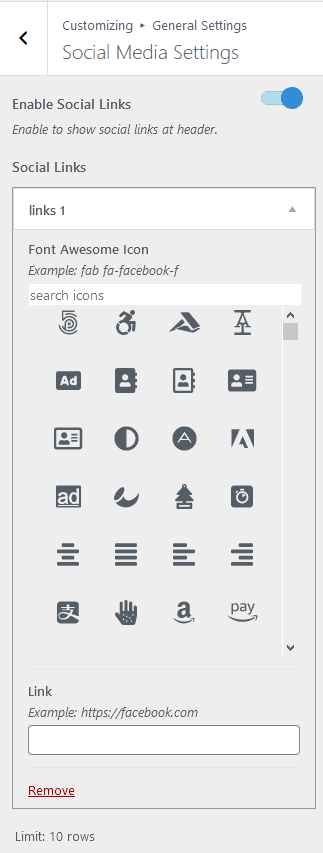
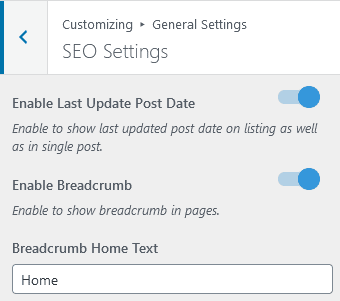
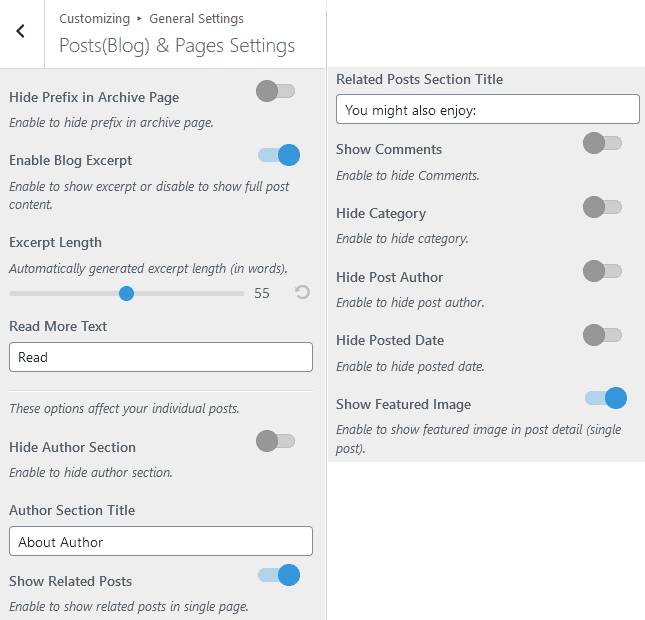
Here, you’ll get to customize header, social media, SEO, as well as posts and pages settings in detail.
The header can include a search bar and a custom image that stands above the overall theme.
Social media links work just like you would expect them to – providing a connection between your blog and other platforms.
SEO settings enable you to use the breadcrumbs method that will ensure your pages have a better SEO score and subsequently are featured more as search engine results.
Posts and pages settings have a bit more to them compared to the rest but are mostly about what’s displayed and what’s hidden on the frontend. The default options are usually safe enough to keep, but if you feel you need to change something, this is where you will do it.
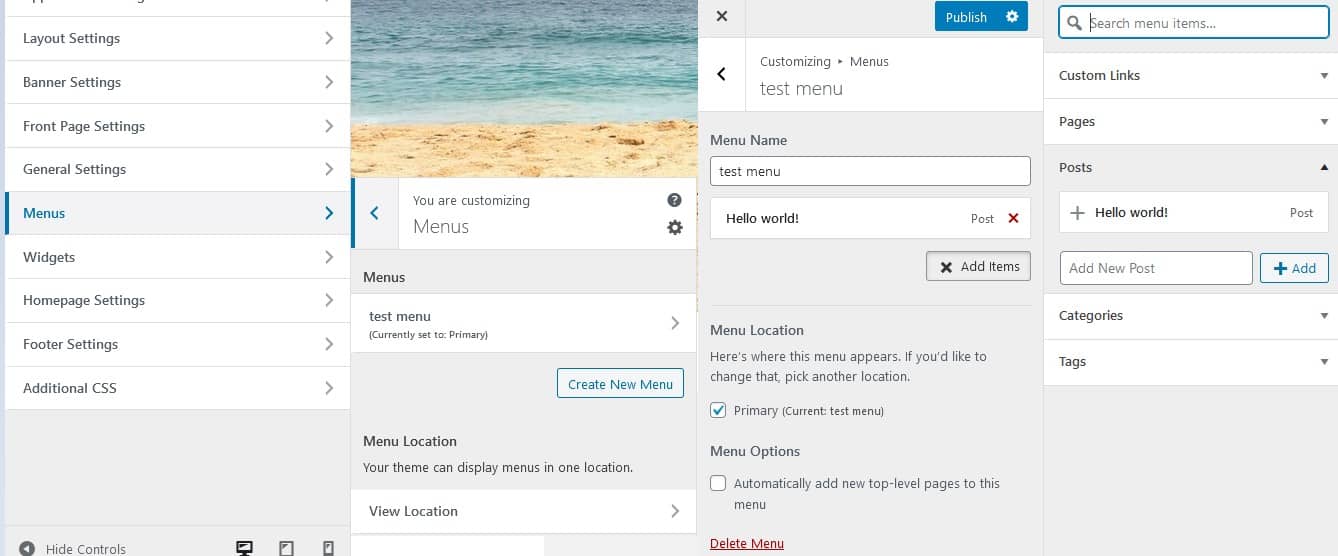
Menus need to be created first before they can be incorporated into your pages. This can be done through the dashboard or to save you time, right from the theme’s customization page.
Keep in mind that you do need to have content to put in said menus since creating blank ones doesn’t really serve a purpose. Think about what you want your page navigation to be like and implement it, and don’t be afraid to use examples from other sites as your template.
The widgets tab works precisely like the one we’ve already covered within the title page settings. Everything applies the same way here, with the addition of new places to put your widgets in, including, among others, the sidebar, footers, etc.
Within the sections, you can rearrange them, add new ones, or delete old ones.

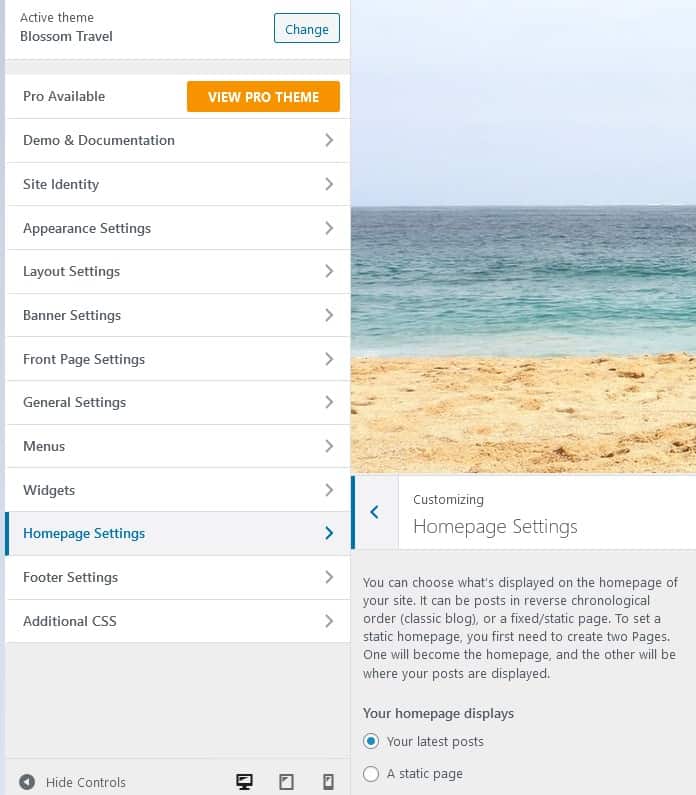
The homepage can be set up in a way that it acts as a static homepage you see on other multipage sites, or you can go right into it and show your posts right off the bat.
There is no universal way of doing things, so the choice is up to you. A reasonable option could be to start with a static homepage until you’ve built up your post count and then potentially swap.
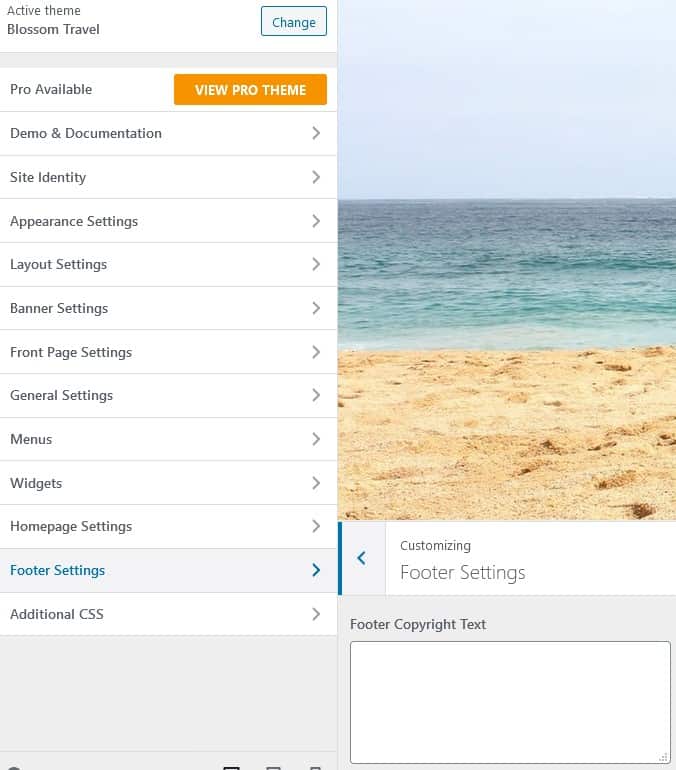
The footer is used primarily for social media icons, navigation, and/or copyright data. The Blossom Travel theme enables you to use the latter in the free version but allows you to customize it into anything else in the pro version.
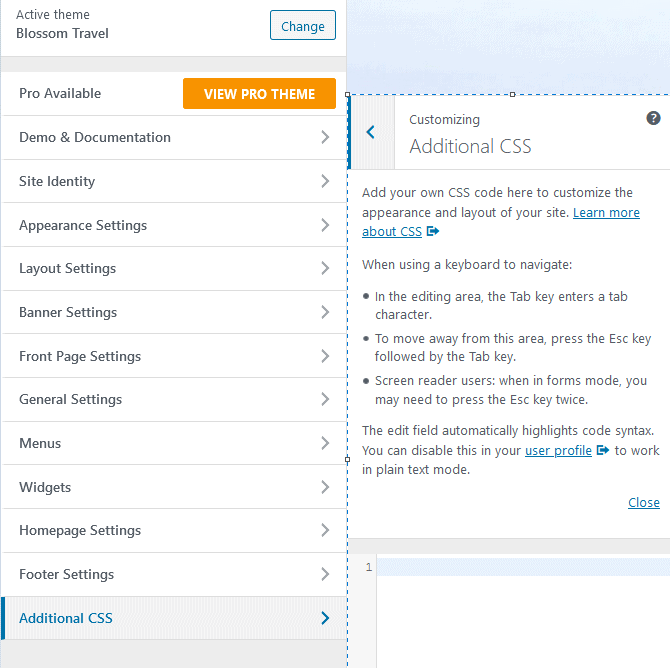
Lastly, for advanced users, the final tab enables the use of additional, custom CSS. Through coding, you can customize any element as much as you want, but don’t forget that if you’re not sure what to do, in the very least, try the new attributes on a staging site first.
Browsing nowadays is done more often through phones and/or tablets than through the classic desktop interface. Because of this, any theme you want to use needs to be scaled down to fit smaller screens and navigation options. Luckily Blossom Travel is fully responsive, and you get to preview how it looks by simply clicking the appropriate screen icon.
Plugins
You know how to set up a travel blog now, but how about making your life a little easier by using what WordPress offers in spades – plugins. If you’ve never had contact with WordPress, it’s hard to relay just how many of these you have at your disposal.
The repository numbers hundreds of thousands of options that range from those that utterly change the way you interact with WordPress from the backend to those that add small, incremental changes to specific areas.
Since there is so much at your disposal and everyone likes to make their own setup, we’ll try to single out the plugins that will primarily help in the beginning while you’re still starting out. Afterward, you’ll have more than enough experience to pick and choose for yourself what to download and activate.
UnderConstructionPage
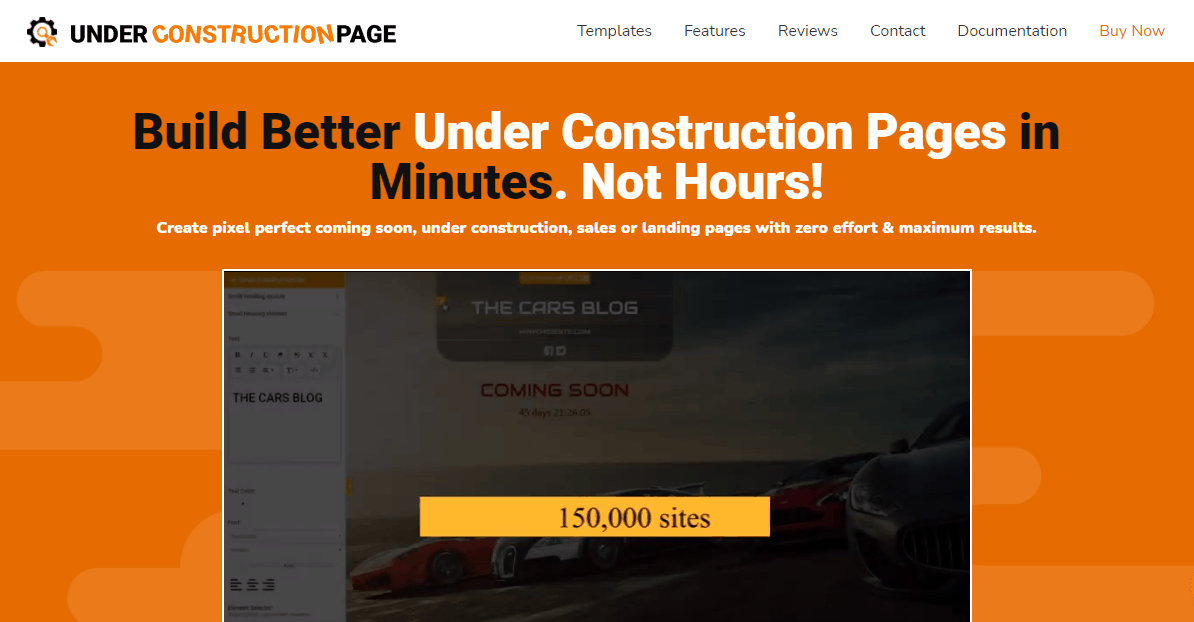
Why not work on your internet presence even before you’ve made your first post. We’ve all seen the pages that try to make you hyped up for an impending site/blog reveal, so why not hop on the bandwagon. There is an abundance of “coming soon” and “under construction” page plugins out there, but we’ve decided to single out one of the best.
With the UnderConstructionPage plugin, you’ll be done in mere minutes and can start generating that traffic. The plugin features over a million HD and 4K images, over 170 professionally built customizable templates, a simple-to-use drag-and-drop editor, and metric information about the traffic your blog generates.
WP Reset
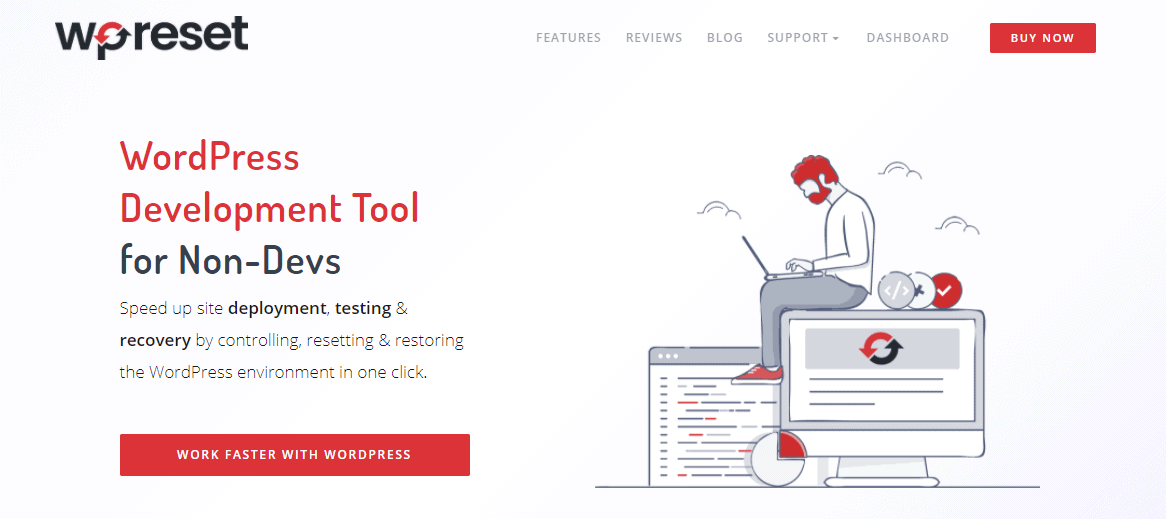
WP Reset is an interesting plugin. Just as its name suggests, with it, you can reset your site/blog. The misconception we usually have about website resetting is that we equate it to resetting your computer. But, there is so much more to it.
Using the WP Reset plugin, you’ll get to completely reset your site or reset only certain aspects of it. When starting out, you might make mistakes in the backend that become too far gone to fix, and those are times when a reset is a prudent solution. You can even make snapshots that function as “light” backups that can be used for saving data when making adjustments like changing themes or adding new plugins.
Akismet Spam Protection
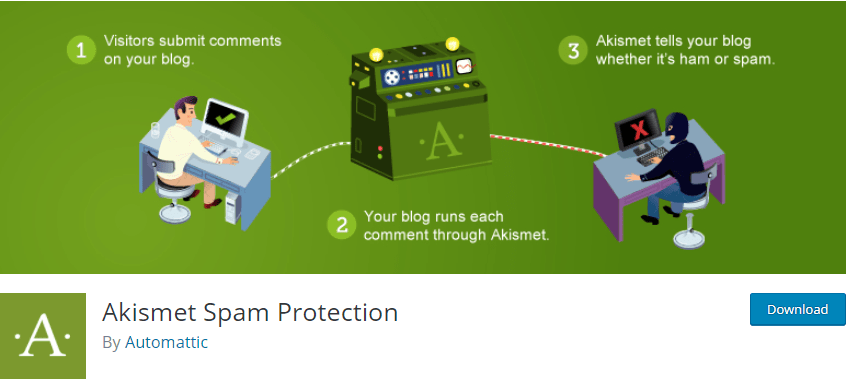
The web is littered with spam on every corner, and if you’re not keeping it under check, it runs the risk of ruining your SEO score, user experience, and ultimately the overall perception of your site.
Akismet is by far the most well-known and commonly used plugin that deals with spam. The way it works is simple – comments are constantly monitored, and spam is automatically flagged. Spam comments won’t even be seen on the frontend, but the admins and moderators will get relevant data regarding what triggered the flag, giving them all they need for further actions on the backend.
Google Maps Widget
A traveling blog that doesn’t feature Google Maps in any way really doesn’t make much sense. The Google Maps Widget plugin is the perfect plugin that will seamlessly integrate the popular map widget enabling your readers to more easily connect to the places you’ve visited.
It’s extremely easy to use, enabling you to create a map with a thumbnail and lightbox in moments. Not only is it simple, but it’s also fast as well. By using the Google Maps static maps API, entire maps are loaded in just one request, and we all know that the shorter the process, the faster it finishes. Your blog will see practically no changes in load times with and without the plugin.
Yoast SEO
A high SEO score is crucial for your site to have any relevance where search engines are concerned, and since everything on the web revolves around Google, you’ll need to take that into account.
With Yoast SEO, you can’t go wrong. Along with working in the background to make your pages more SEO-friendly, it will also give suggestions on writing to improve your SEO score. To really get into it, you’ll be able to access numerous advanced metrics to follow your progress and make the needed changes; plus, if you opt for the pro version, even more features and data will be available to you.
Plugins for turning your blog into a store
You can use your blog for more than just publishing content. It can also be used as a store for all the great products or even services you have to offer. This transformation is achieved using the right plugins, starting from the basic WooCommerce plugin and going all the way to the ones serving a couple of very specific features. Need examples?
WooCommerce Order Export
This will become your go-to solution for exporting WooCommerce order data quickly and automatically. The data gets delivered to you in reports in CSV format through FTP or email. You can set up multiple scheduled reports for your accountant, packing staff, and others. On top of that, exports are easily copied between stores. The plugin is also very smart and remembers the orders you already exported.
WooCommerce Table Rate Shipping
Maybe the best solution for calculating shipping costs and using advanced shipping rules. This plugin offers shipping classes, the option to import/export/hide/forcibly use shipping methods, and have unique shipping method names. Shipping method labels can also be dynamically changed based on what’s in the cart and handling fees can be added to each order. To make things even better for you and your customers, there are logged-in user rules for applying special rates for those loyal to your site.
Direct Checkout for WooCommerce
If you land on a good WooCommerce store, chances are it’s going to let you skip the cart. You can have the same feature on your site with the Direct Checkout for WooCommerce plugin and its buy buttons. These buy buttons, once clicked on, redirect a customer to the checkout and save their time by skipping the cart entirely. You can have this happen for all your products or just individual ones and the buttons can find their home anywhere on your site.
Summary
Believe it or not, everything done up until this point has been the easy part. You can create the perfect conditions, but your content still needs to be up to a certain standard if you want to reach the right audience. As we’ve emphasized a couple of times, there is no universal answer or formula to follow, but that just means your possibilities are endless, so get out there and start writing.
Hi there,
This article is very descriptive, and the features mentioned are important and useful. Thanks for sharing, Cheers!
Thank you for sharing this Article
Thanks for sharing with us useful blog about use to wordpress in easy way.
Thanks
Great post about starting a travel blog and both those hosting options are great although I’d also recommend WP Engine as it’s entirely focused on WordPress and has a 1 click staging site.